If you have a Tesla, then you should absolutely check out TeslaMate which is data logger for your car(s) that one self-hosts. This uses the car’s API and gets all different kinds of telemetry of your drives, charging, batter conditions, acceleration, braking, parking, etc. I personally prefer this, over other online services (of which there are a few) - as it is giving away the keys to the kingdom - literally in this case (the Tokens used to authenticate and login).
I have been running TeslaMate at home on a couple of machines for a while and figured a cloud version would work out better. I had network issues on one of the machines, where no car telemetry was downloaded. It was a few days before I realized that the machine wasn’t online due to a separate DNS issue and those few days’ worth of car telemetry (drives and other data of course) wasn’t recorded.
In our example, we will deploy TeslaMate in a docker container running on Ubuntu - which is hosted on Azure. To help with isolation and managing this, I would recommend we use a resource group (RG) only for running TeslaMate. Of course, we need an Azure subscription, which I would assume you already have.
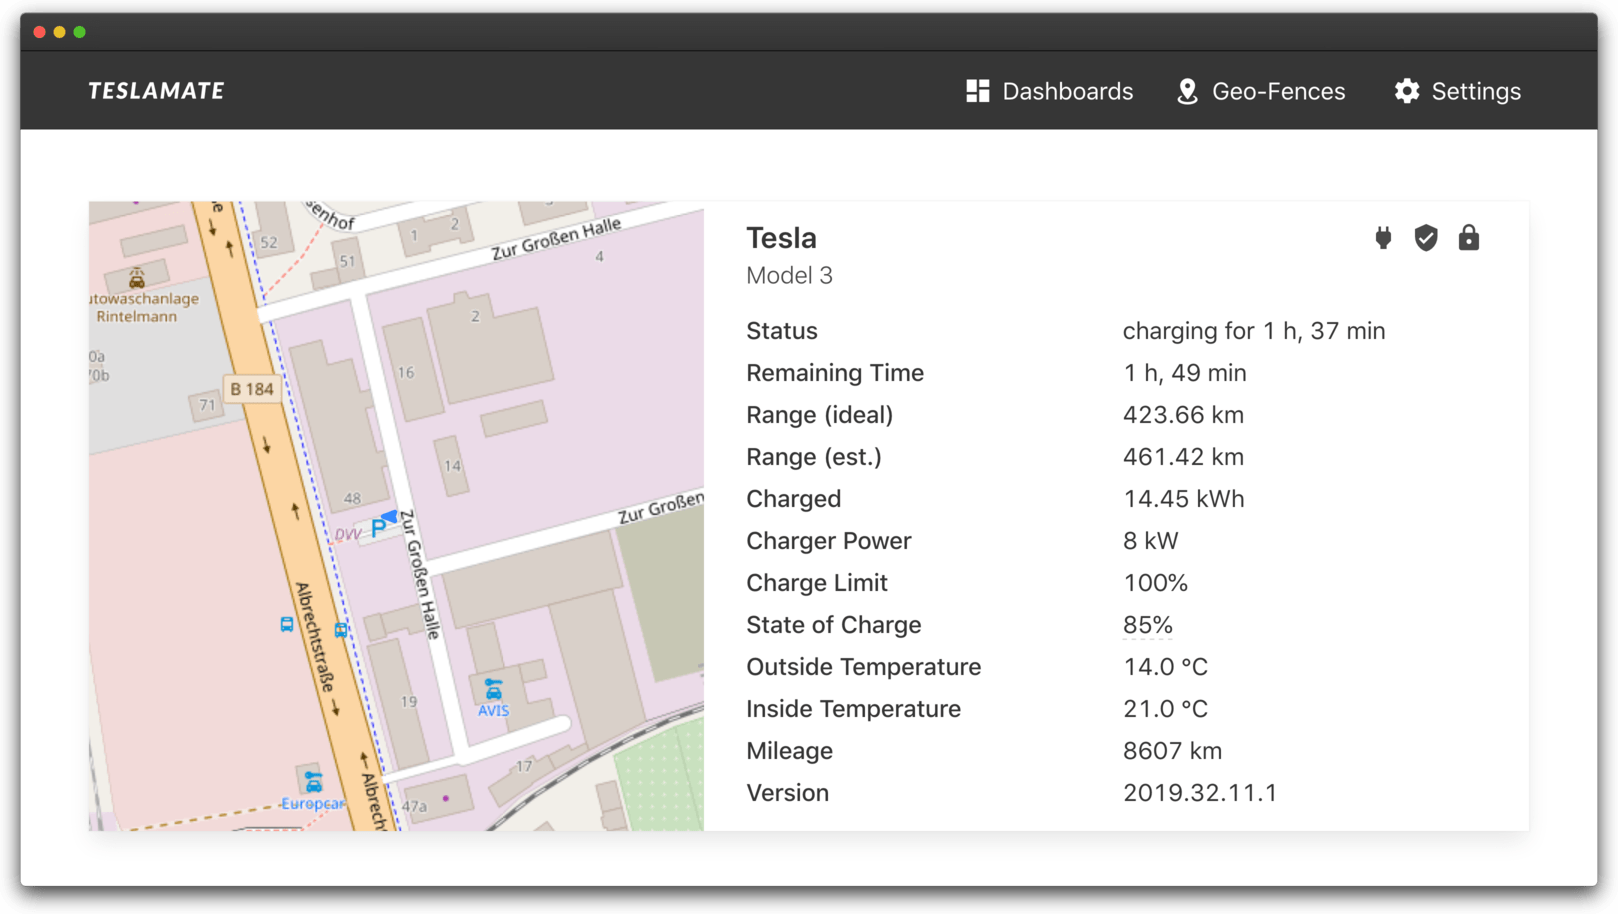
If you are not familiar with TeslaMate, before we get started here, I would highly recommend checking out the features , including some screenshots and the installation documentation to get an idea.
Step 1 - Creating new RG
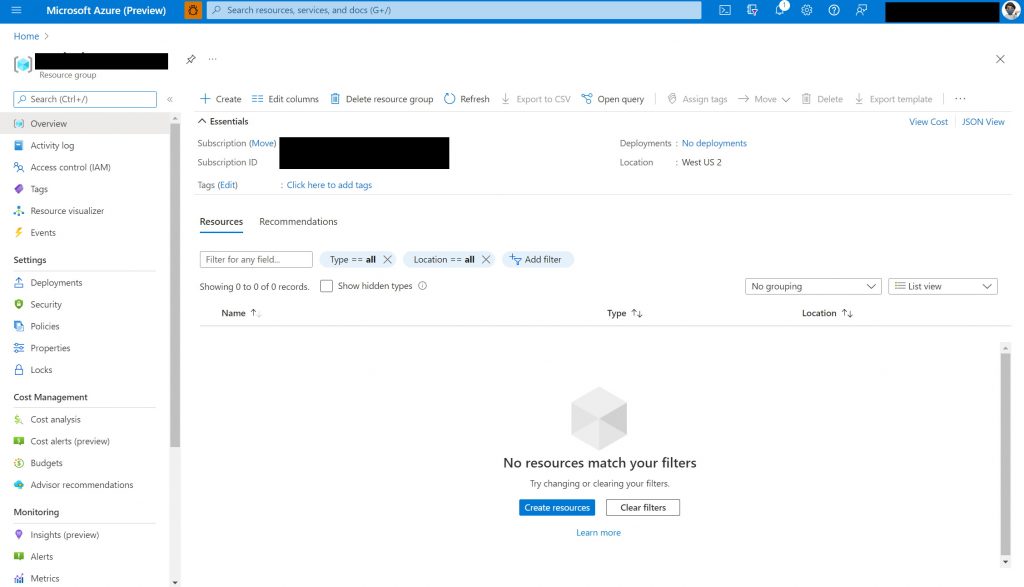
We start by logging into the Azure portal and create a new resource group (RG) for TeslaMate; if you are not sure how to do this, the documentation here outlines the steps needed. Once you have an empty RG, it would look something like the screenshot below.
Step 2 - Creating new Ubuntu VM
Now that we have a new RG, we need to create a new Ubuntu virtual machine (VM) in that. We will choose the option to create resources as shown in the middle of the screen (see previous screenshot).
Clicking on “Create resources”, we see various menu options; the options you see might be a little different than the one shown below.
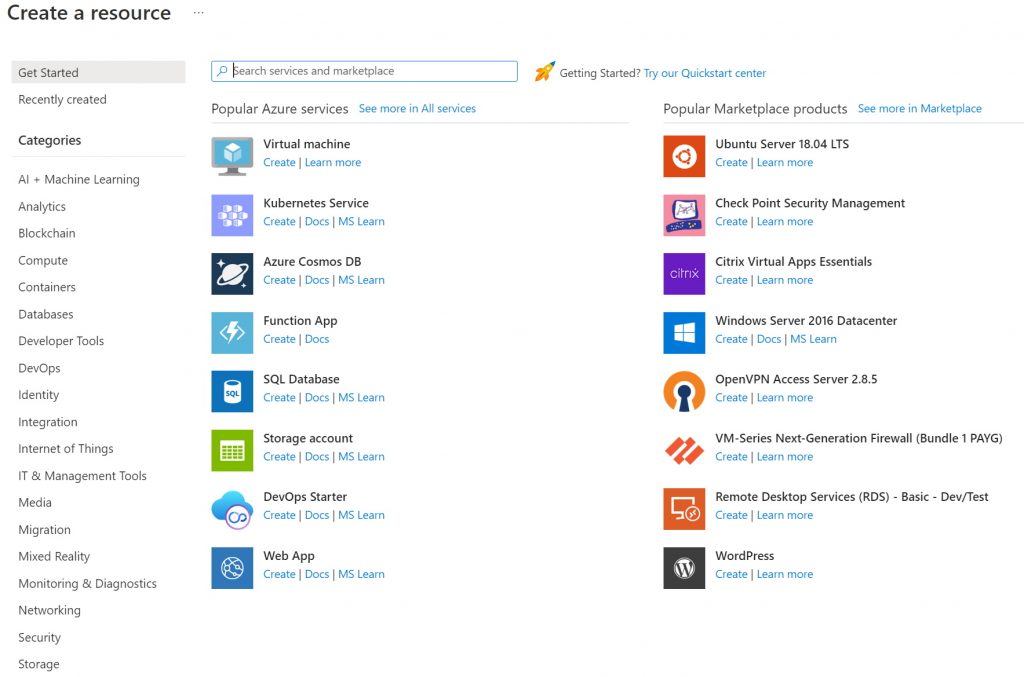
We need to create a Virtual Machine - the first choice under “Popular Azure services” and will click the “Create” link. This starts a wizard that allows you to go through the various settings and options.
The first step when creating a VM is to start with the basic details for machine we are creating - instance details, subscription details, admin user details, etc. I outline the steps and show screenshots to help those who are not comfortable with this level of tech, or new to Azure. If you are a more advanced user, a more efficient way would be via the Azure CLI . You can read up more details on VM’s on Azure here .
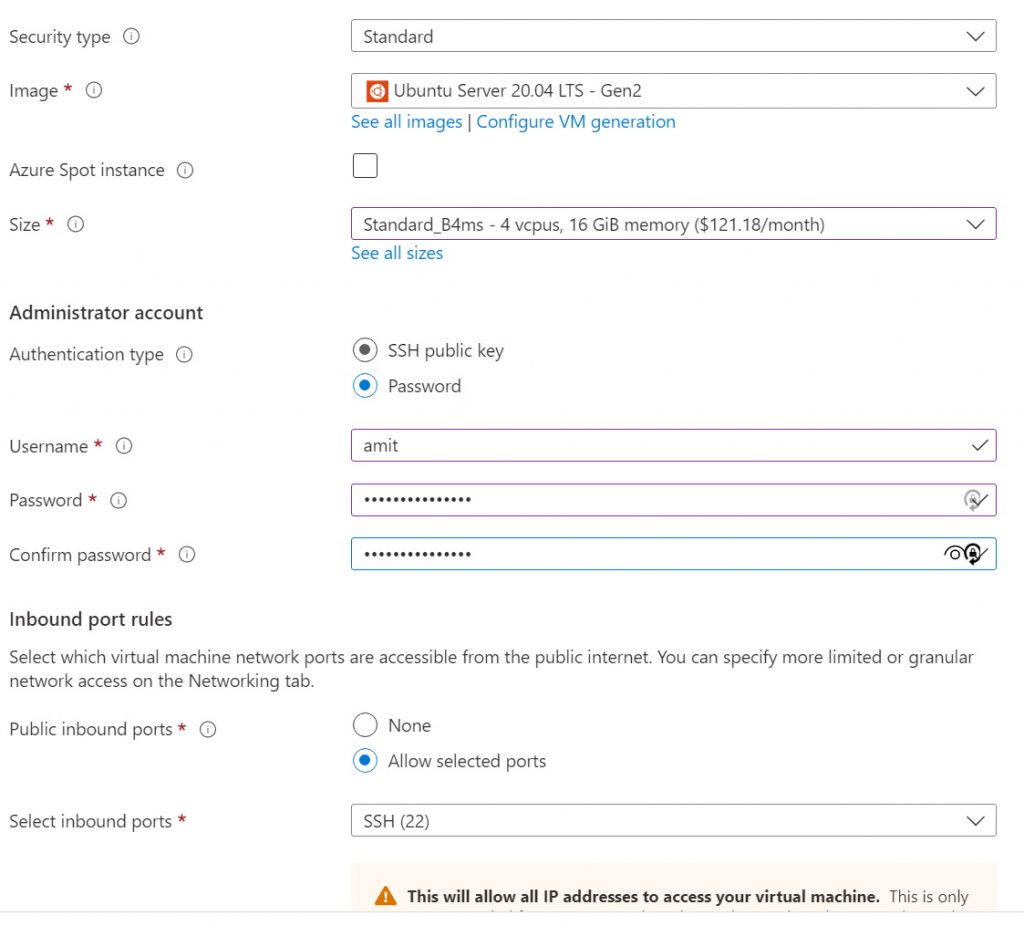
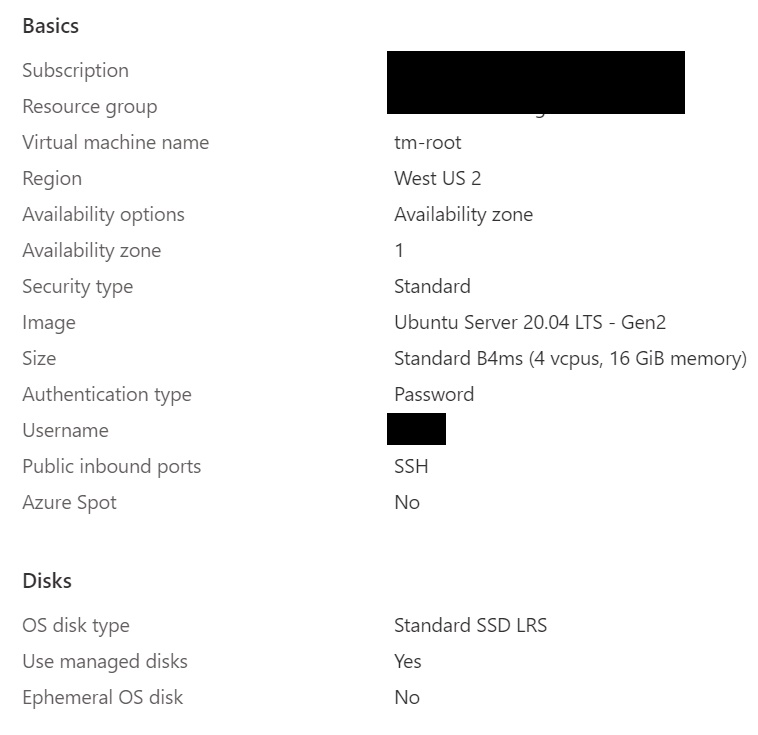
Step 3 - VM Basics
- Subscription and resource group - Make sure you have the correct subscription and RG selected. If you haven’t created a new RG yet, you can do so using the “Create new” link under the RG option (see the screenshot below).
- VM Name - You can give the VM any name - this is more for you to remember and manage.
- Region - In terms of a region, in most cases it would make sense to pick a region that is physically close to the same area where you are based (and the car too of course).
- Image - I use the latest Ubuntu LTS image which as of this writing is v20.04 Gen 2.

- Size - In terms of picking the size for the VM - we don’t need a very beefy machine, and needless to say - the bigger the machine, the higher the monthly costs. I keep the standard Size. This is not my main instance as I already have that running - this new instance is being setup as a demo that I will be deleting later.
- Username - This is obvious and should be something you know and can remember.
- Password - I choose password as the auth type, more so as this is for demo purposes for this post; ideally ssh keys are more secure and you would want to use that. If you do go down a password path, I cannot stress enough not to reuse passwords and create a strong password; it is always a good idea to use a password manager (e.g., I use LastPass).
I chose the simple SSD option; we don’t need a lot of advanced things.
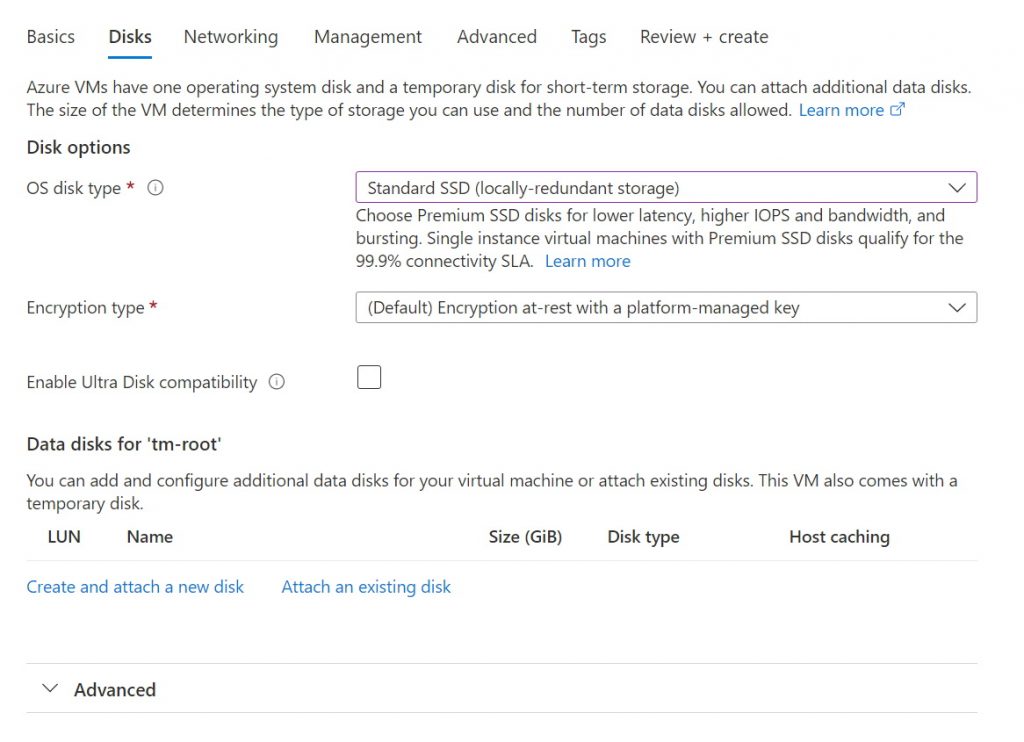
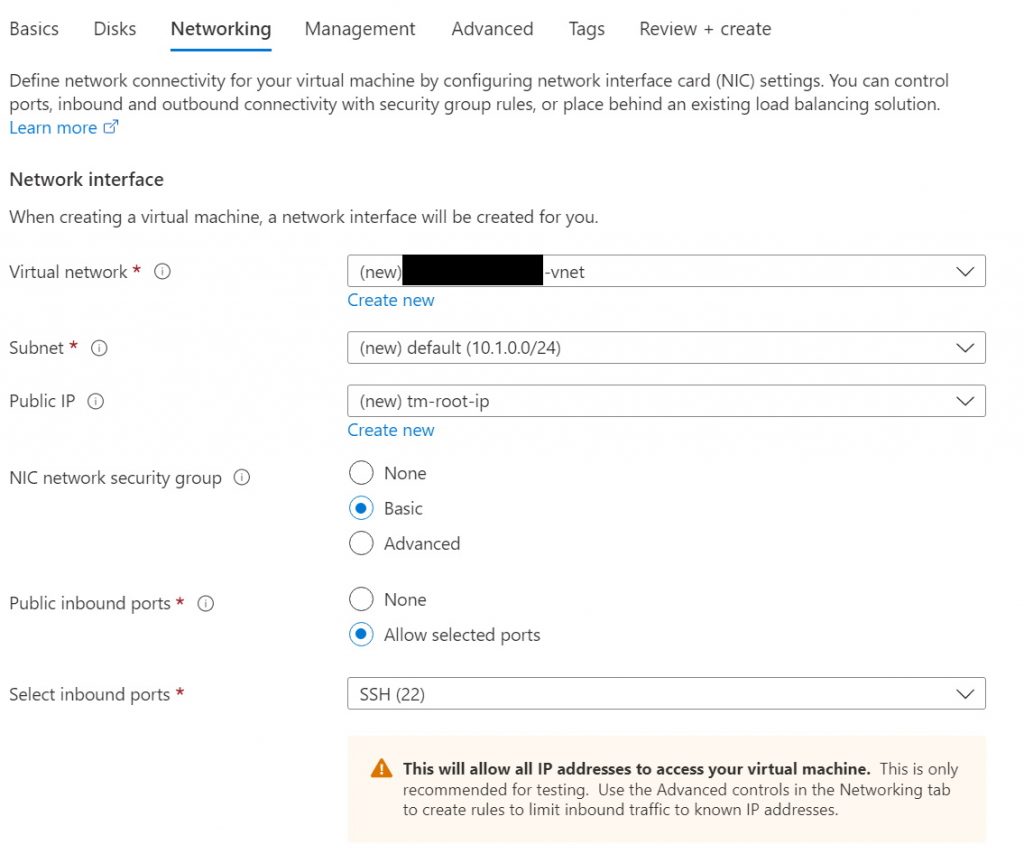
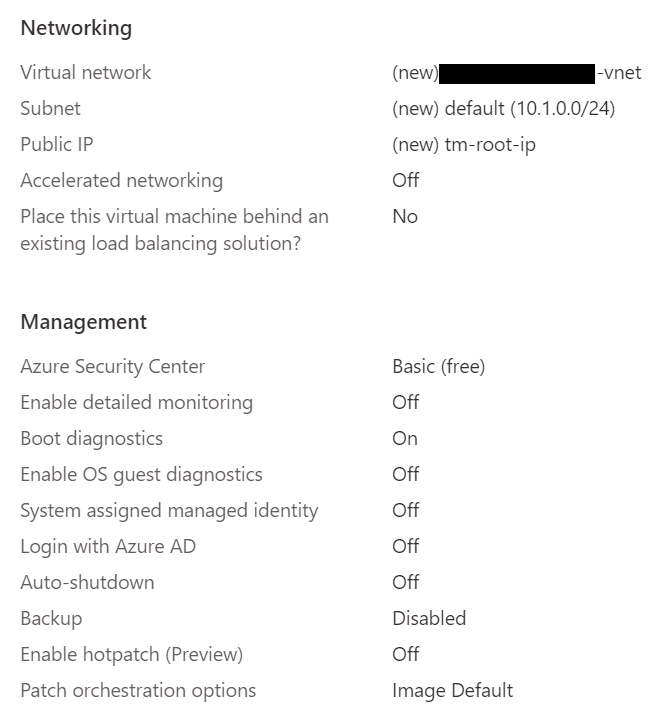
For the network options, you do want a public IP and, in most cases, just leaving the default would work. And I don’t show it in the screenshot, but we don’t need a load balancer and leave the default option of “None”. And we do want the ability to ssh into the machine to deploy and manage TeslaMate.
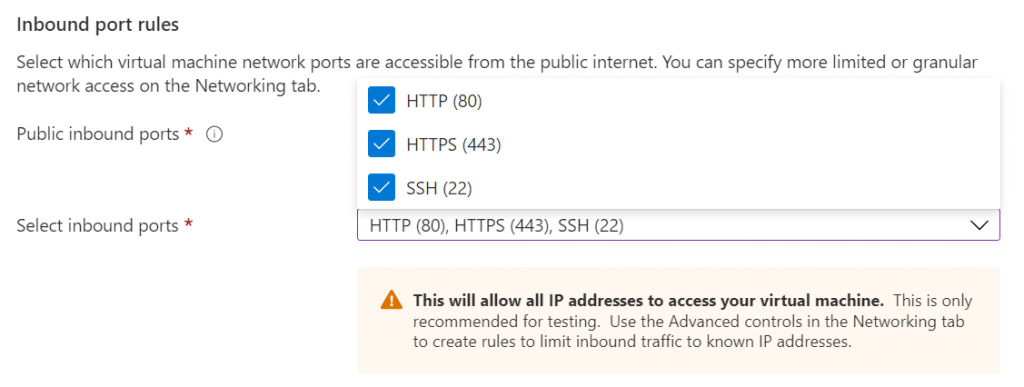
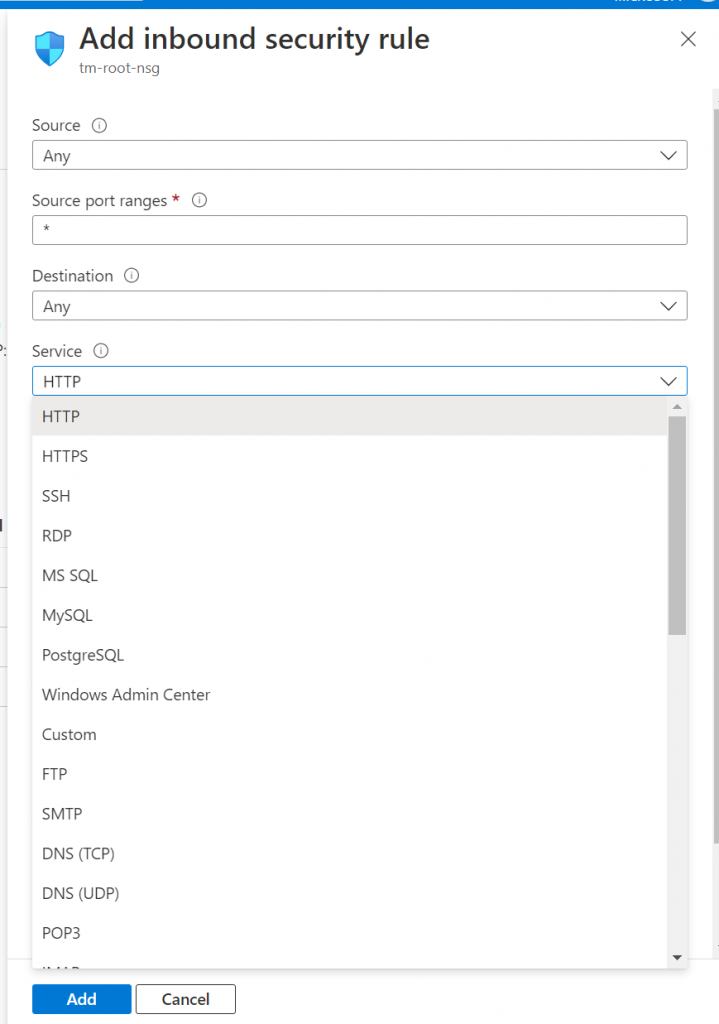
For the Inbound port rules, by default only port 22 is enabled for SSH; to allow us to access the web server we also need to both ports 80 (http) and 443 (https) are enabled as shown in the screenshot below.
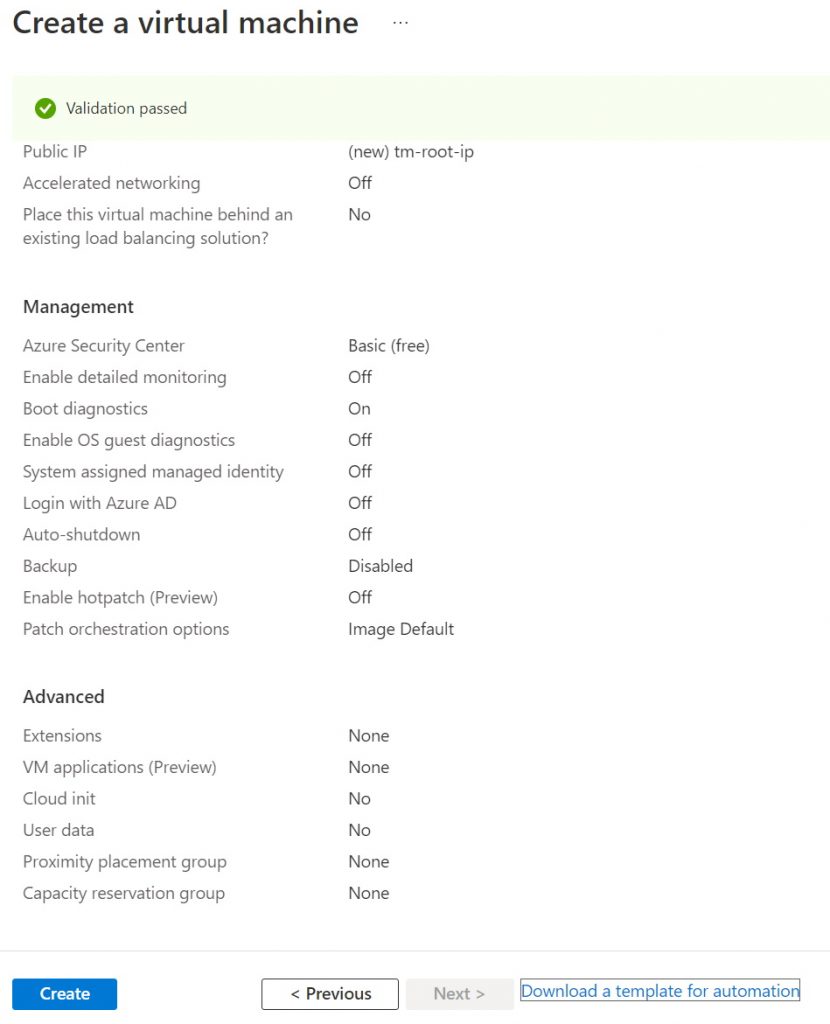
For the next set of Tabs (Management, Advanced, and Tags) I didn’t change anything and went with the defaults. Once the validations are passed, and the final review shows the cost and other details you choose.

And once you are happy with everything click the Create button on the bottom left corner.
Once the deployment of the VM starts, it can take a few minutes and you will see a similar progress as shown below.
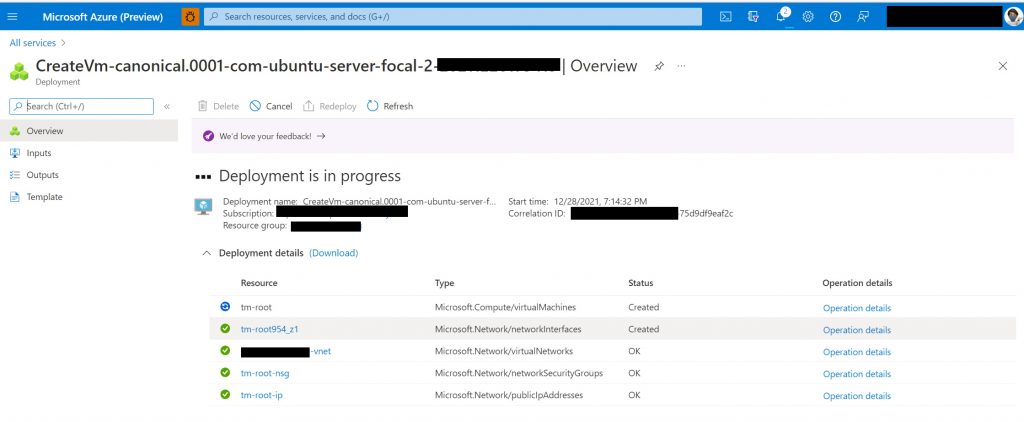
Once the VM is created, deployed and wired up (which can take a few minutes) - we will see the confirmation as shown below.
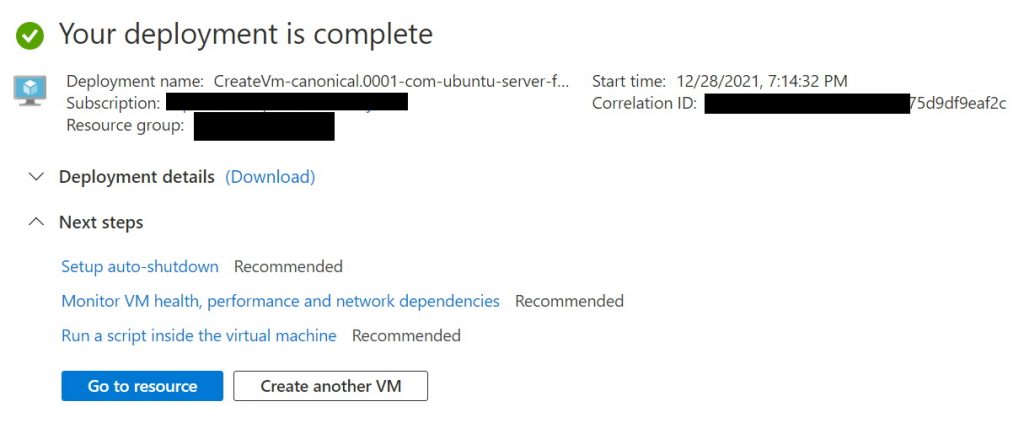
From the confirmation screen, clicking on “Go to resource” takes us to a screen where we see the different details of the VM. One of the details we are interested in at this point is the IP address and the ability to give the machine a DNS name. We need these to be able to connect to the VM over SSH (see screenshot below).
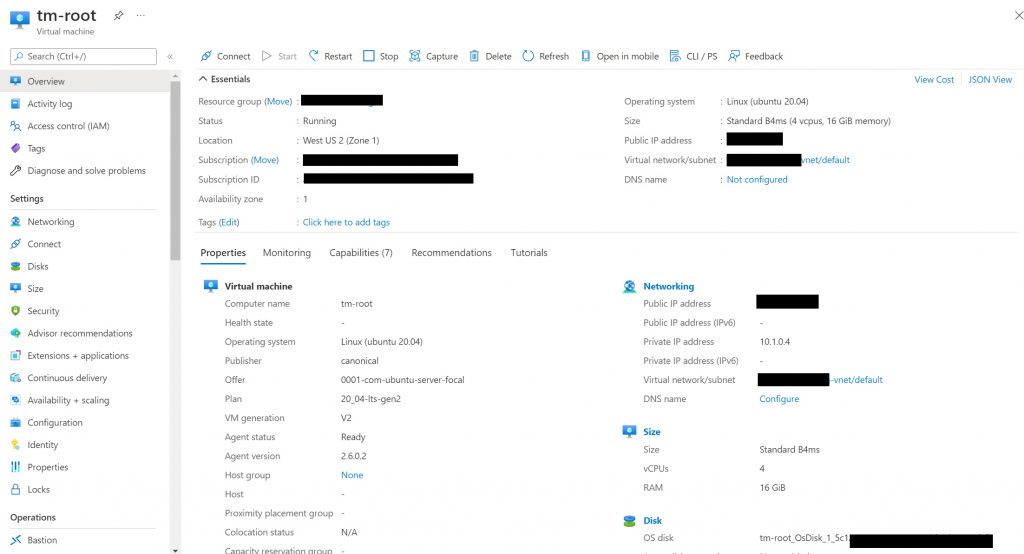
It might be worthwhile to also setup a DNS name that one can use in addition to the IP. This DNS name would be the fully qualified domain name (FQDN) that would be needed later when configuring the docker container. The DNS name allows us to connect to the machine using something like "https://my-car-details.cloudapp.azure.com"" (or similar). You can read more details on FQDN in the Azure docs here
. If you are interested in using your own DNS server, you can read details on how to go about that here
.
Click on the “Not Configured” for the DNS name (as shown in the image below) and you can set a unique name that is something memorable.
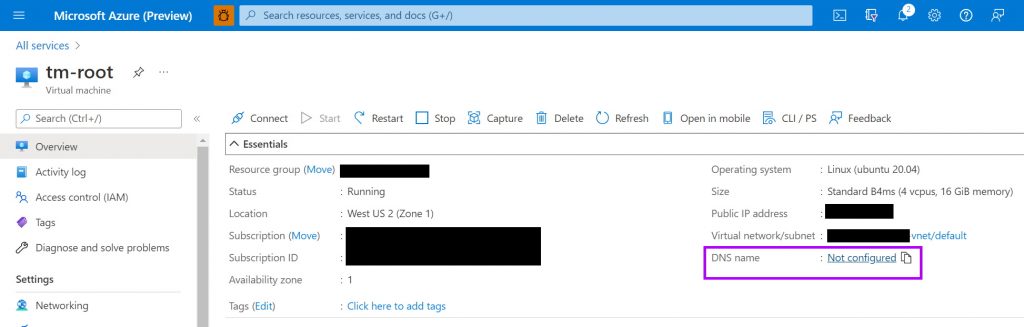
The DNS name is tied to the region you have, and it must be unique.

And once this is setup, you can see the FQDN in your VM details as shown below.

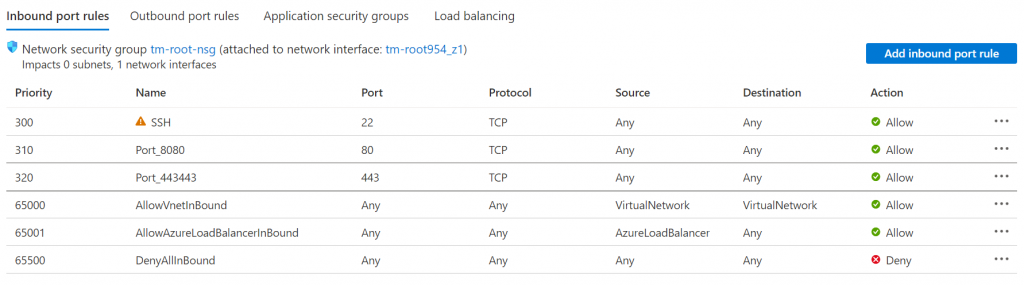
If for some reason you didn’t open ports 80 and 443 earlier, you can always configure them now. To do so, in the Azure portal, when you have the Ubuntu VM resource selected, click on Networking on the left, and you can update the Inbound port rules.
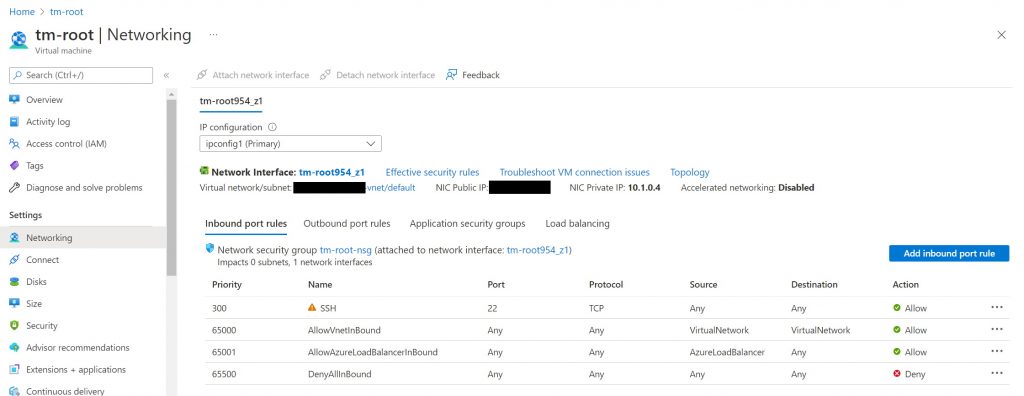
When you add both ports (you would need to give them unique names and priority orders), and the final results would look something like the screenshot shown below.
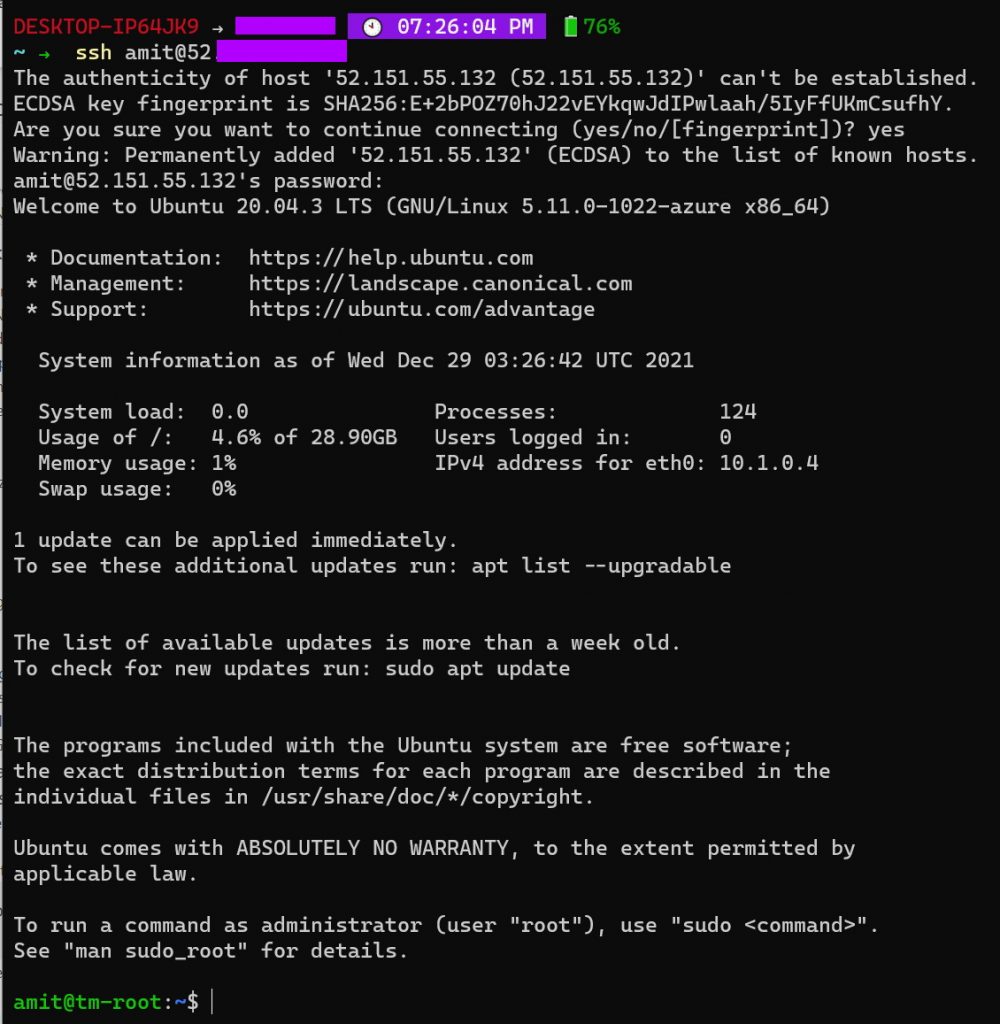
And finally, we can ssh into that machine using the credentials and the IP we configured earlier. This can be done using ssh (e.g. ssh user-name@IP-address of the machine).
Step 4 - Install Docker
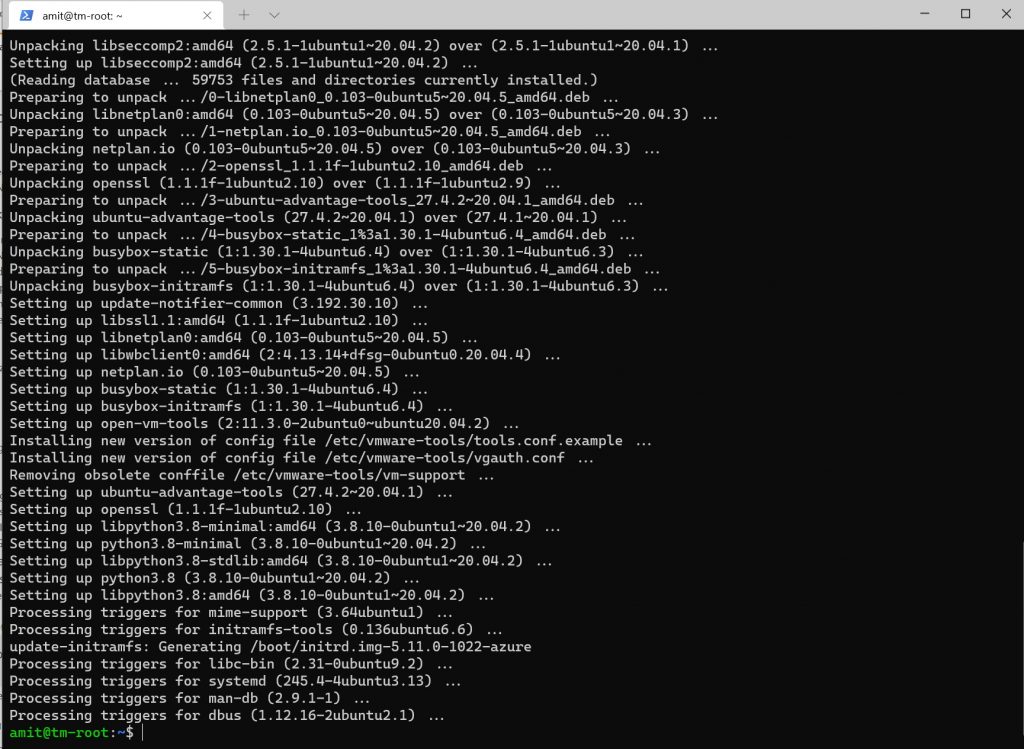
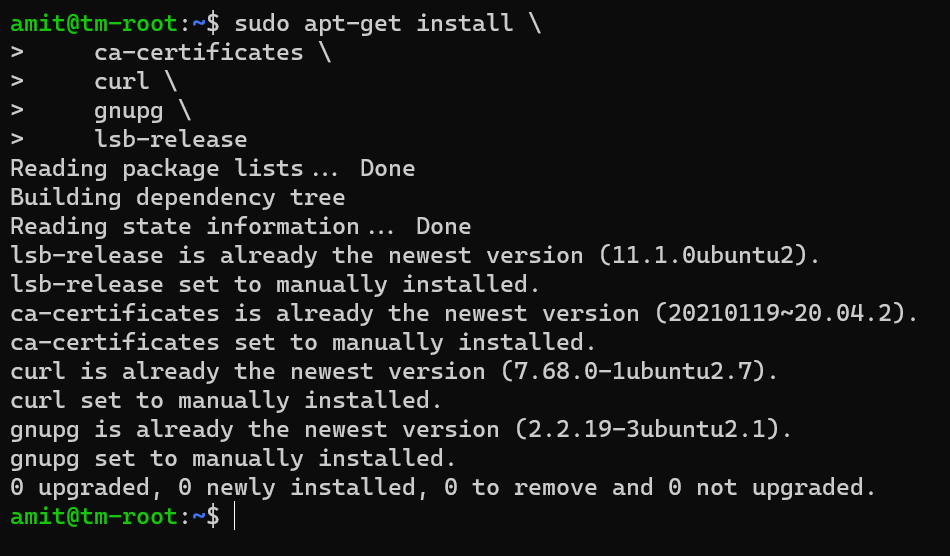
The first thing we need to do once we ssh into the machine is to update the various packages installed. The first time you run this, it will take a few minutes. You do this by running the following commands.
This is pretty standard and should not cause any issues; below is the screenshot showing the output - there are too many packages being updated for me to show everything.
Installing docker on our Ubuntu VM isn’t terribly complex - the docker docs outline all the steps and the details. We will want to install from the repro and follow the steps outlined and be mindful of specific versions and drivers.
We setup the repository, and for that need to install the following prerequisites.
In my case, with the latest Ubuntu image in Azure, we already had these:
Next we add docker’s GPG key using the following command:
| |
The output isn’t dramatic in case you were wondering.

Next we add docker’s repro to Ubuntu - this will allow us to find and install the packages.

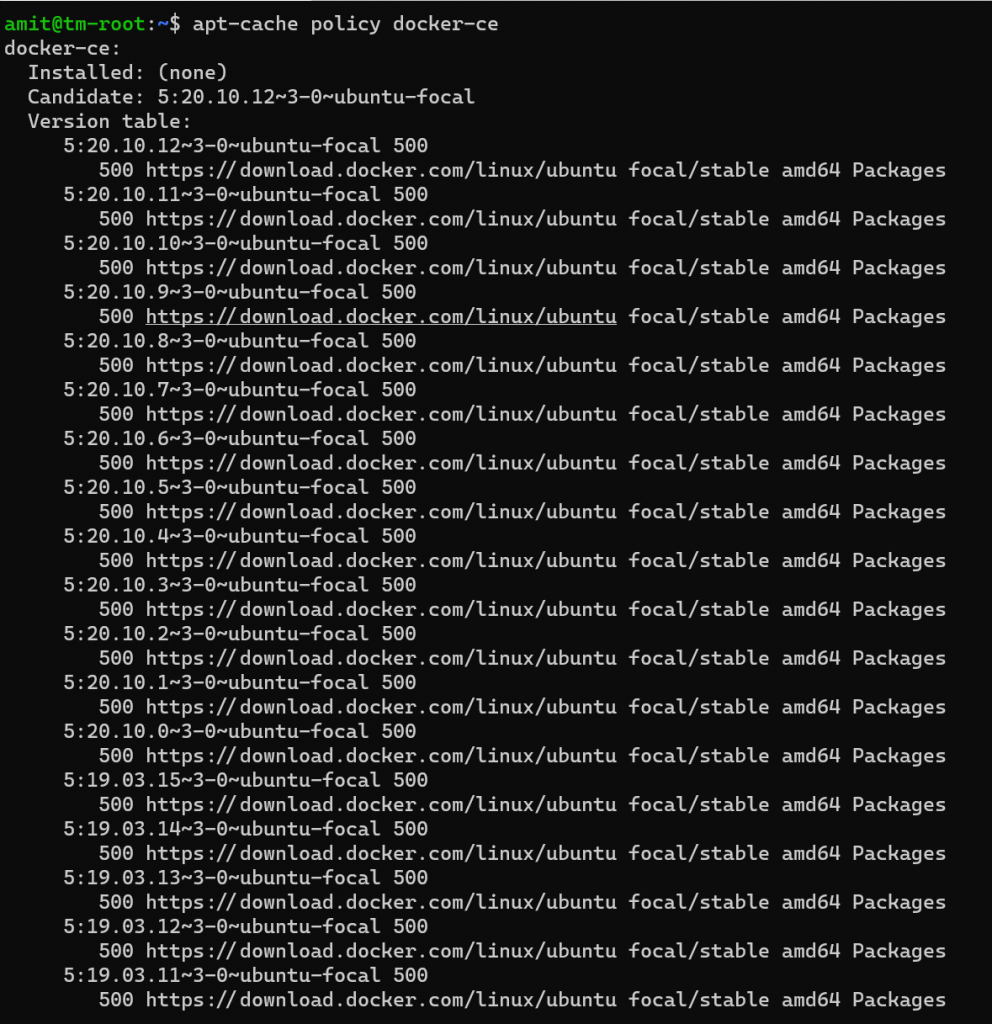
At this time, we should run apt-get update command to update the newly added repository. We should check to ensure that docker is going to be installed from the docker repository, and not Ubuntu’s default. To do this we run the following command.
| |
This shows us that docker isn’t installed, but the candidate for installation is from docker.com and is for “focal” - which is the release name of Ubuntu v20.04. The list we see is long because it outlines the different versions of docker.
Now, we are finally ready to install docker using the following command and also choosing Yes on the prompts that confirm the installation.
| |
Once complete, you will see something like the output shown below.

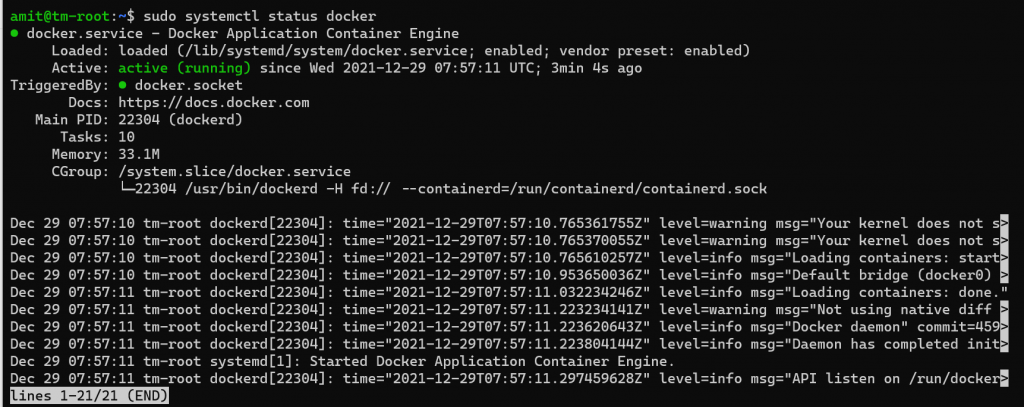
At this time, docker should be installed running. We can also check its daemon is configured to run on booting up.
Whilst not needed, it is good practice to add the current username to the docker group created - this will ensure we don’t need to use “sudo” for every docker command. And using the groups command we can validate our current username ("amit" in my case) is in the docker group.

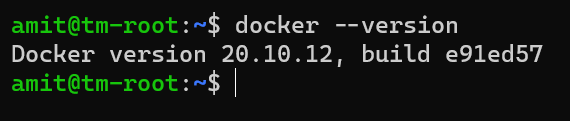
Woot! We have docker running. 😎
The first thing one should do with any new docker installation is to run its equivalent of Hello World. This is done using the following command - which downloads a test image and runs it in a container, prints a message, and then exists the container - so a full life cycle.
| |
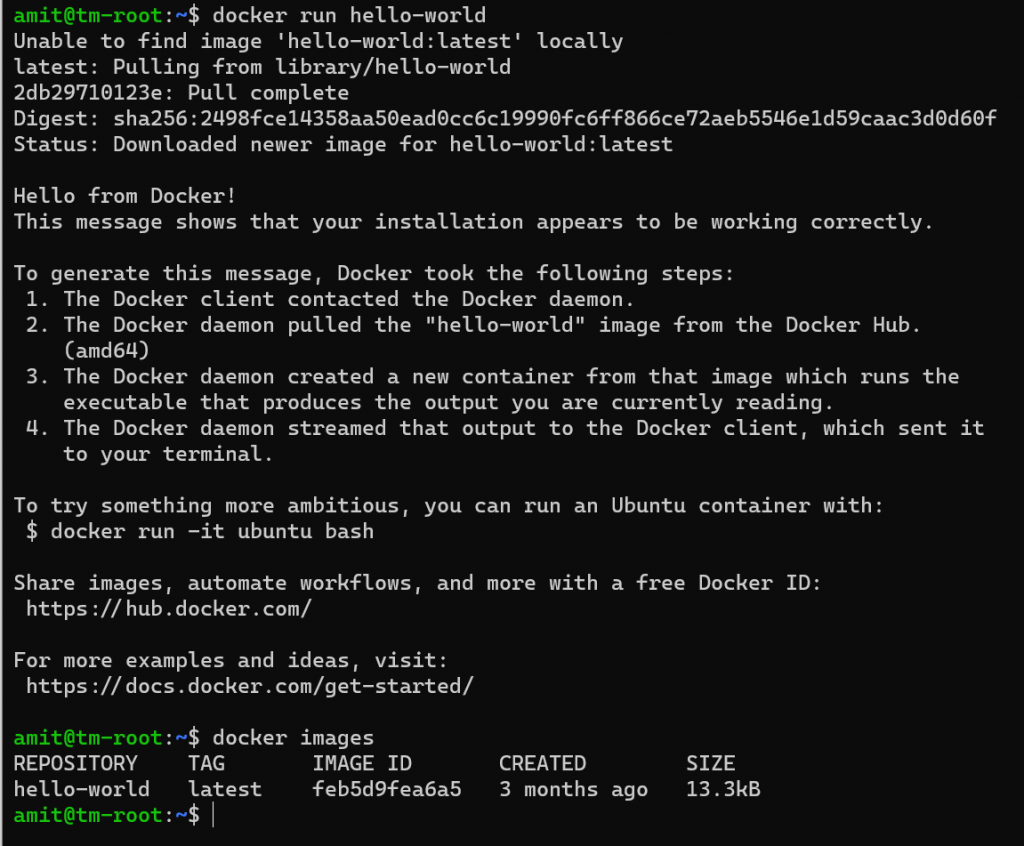
And yay, we validated that docker is up and running on our VM! Congratulations.
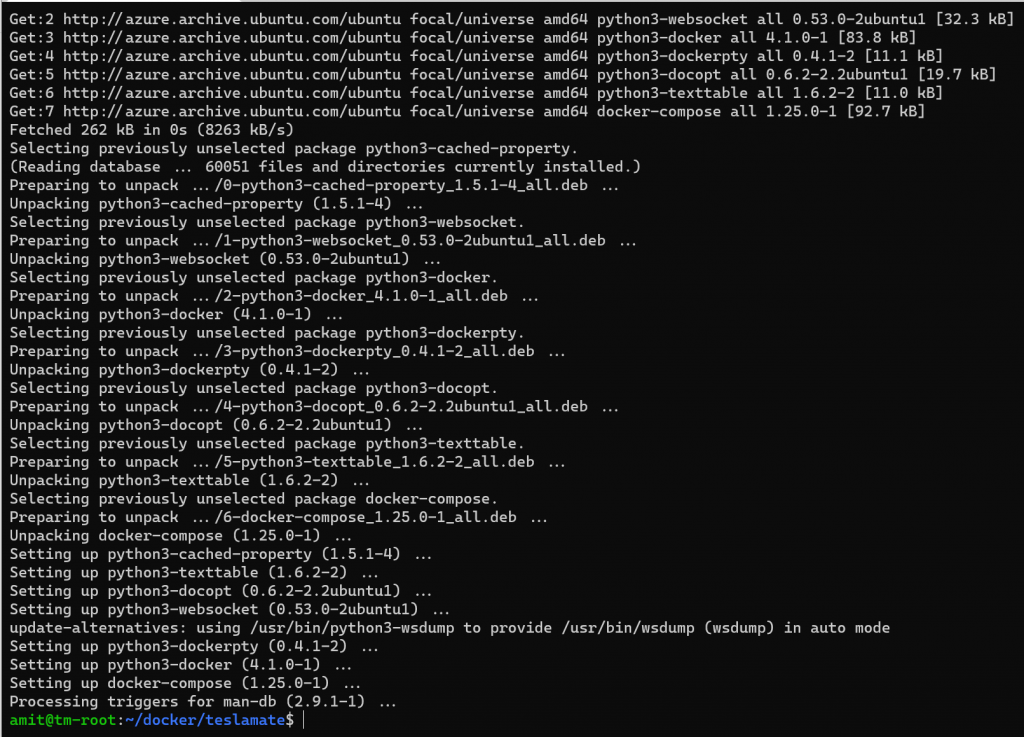
Before we get to configuring TeslaMate, we also need to install docker-compose, which is a tool that allows us to run multi-container docker applications (such as TeslaMate). We will install docker-compose using the following command with the result of that command shown after that.
| |
Step 5 - Configure TeslaMate
Given we will be exposing TeslaMate to the internet directly we should not use the default TeslaMate docker installation, but the advanced version which uses Traefik as a proxy server and helps us secure the web server better and only expose the (Grafana) dashboards behind an authentication mechanism.
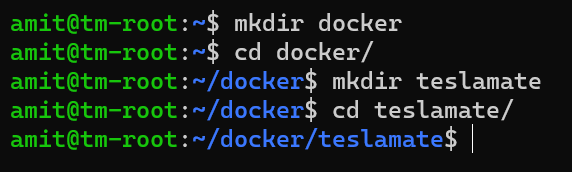
For this we will create a new folder for TeslaMate which will contain not only the docker compose file needed but other relevant configuration details. I like to keep this in a folder, to help manage - in this case it resides in ~/docker/teslamate
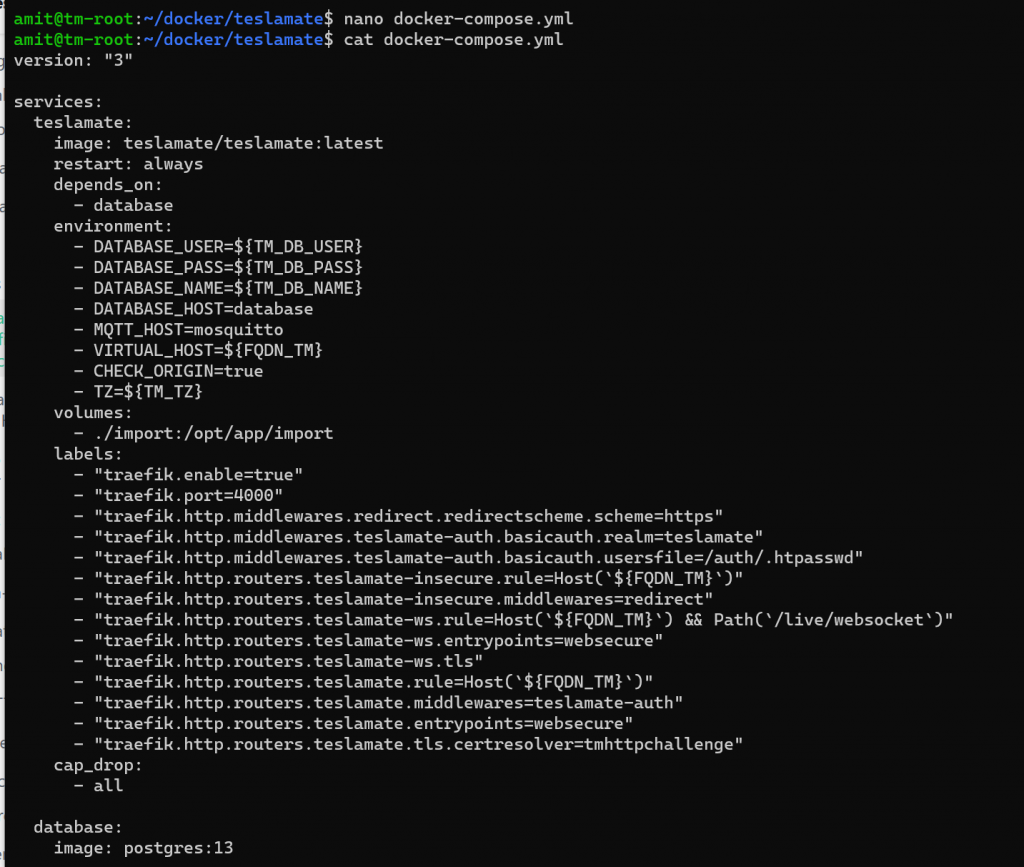
It is in this folder we will create the docker-compose yaml file that is needed; you would want to start with the one outlined in the TeslaMate instructions and tweak it for your needs.
This file needs to be called docker-compose.yml and my example is shared below. It is a good idea to always get the latest yaml file from TeslaMate’s docs
- over time we would expect things will evolve and the file below might not be accurate down the road.
| |
Next we need to create a .env file. The environmental secrets (i.e. passwords) are not saved in the yaml file but are stored are stored in this .env file which we will create next.
We will enter the DNS name as the FQDN that you setup earlier for the VM; update the TM_TZ for the time-zone you are based out of. This is the TZ database name, and if you aren’t sure what it should be for your time-zone, check out the details here .
Like the yaml file, you should get the latest .env file template from TeslaMate , as the one shown below might change over time.
If you are not sure on how to create a new file in Ubuntu (or any other Linux distro for that matter) - you can use nano editor as shown below. You need to make sure this is in the same folder as where the docker-compose.yml file is (which is ~/docker/teslamate in our example).

And finally, we need to create a .htpasswd file which is used to authenticate the website (see TeslaMate’s documentation
for more details). I chose to create this locally after installing Apache tools, but you can also do it online.
Note: this is *not* your Tesla login credentials but are the credentials you will use to access the site we are setting up now.
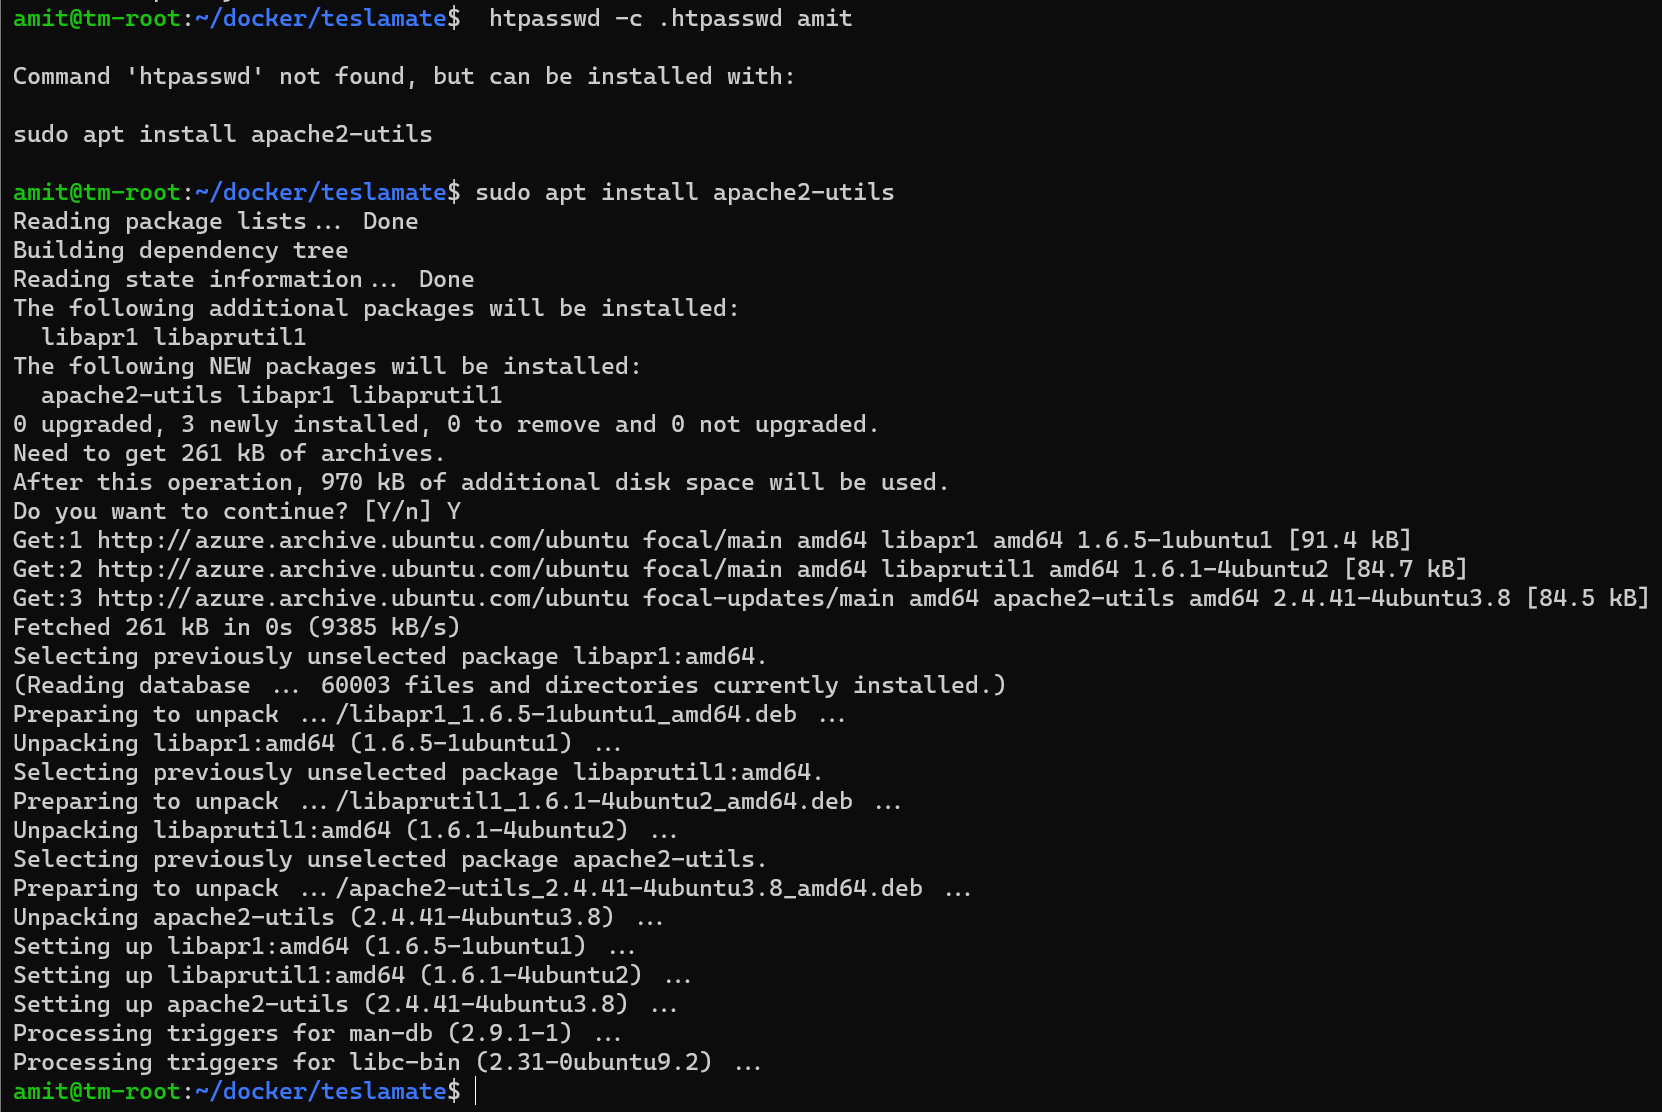
We can create a new file password as shown below. Given we are in the TeslaMate folder, we don’t have to provide a full path for the file.
| |
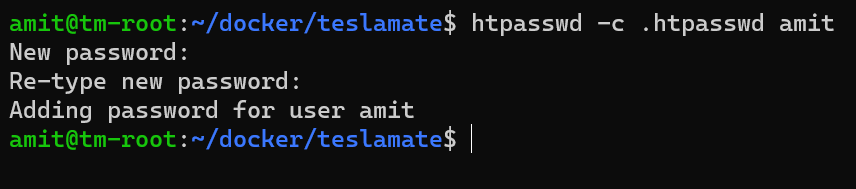
So, in the end we should have the following three files in the same folder:
Step 6 - Starting TeslaMate
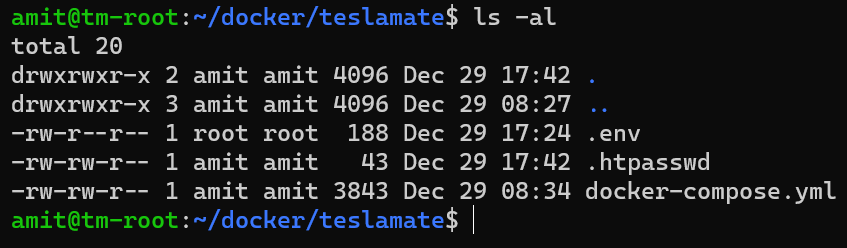
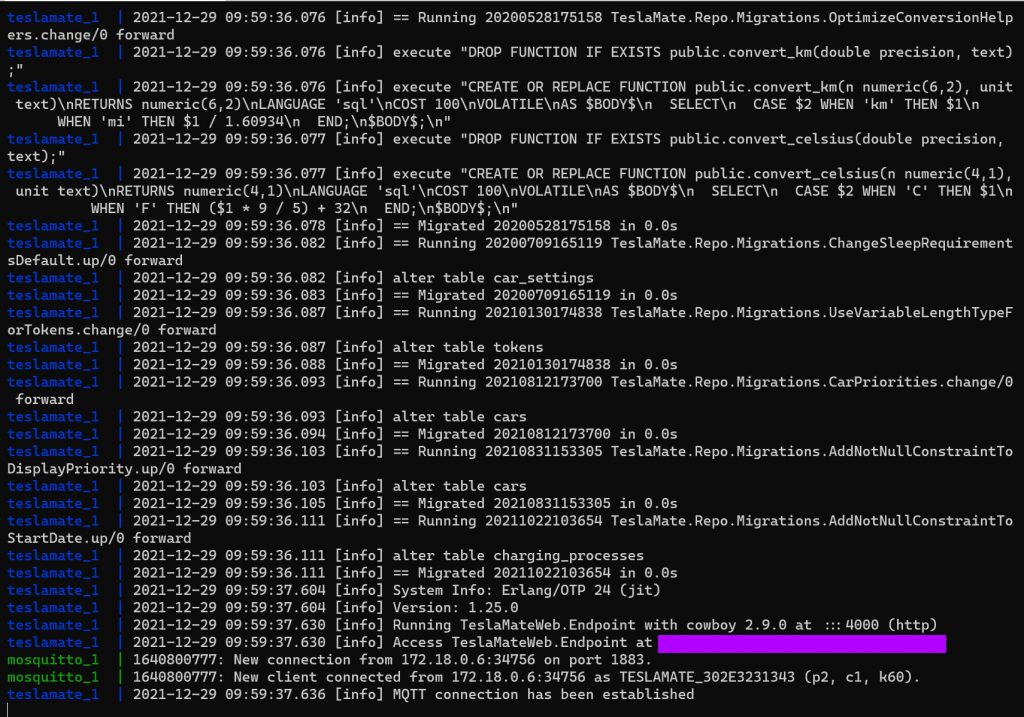
Now we are finally ready to start the docker container for TeslaMate. When this launches, go to the URL for the DNS name you setup, and login using your Tesla credentials. For the first time, I would recommend running the container attached to the console, so if there are any errors or issues you can see them. Normally you would want to run this detached (which is using the “-d”) option.
The first time you run this, it will take a few minutes to pull all the images, and wire things up. During the process you will see the progress for each image in the various container app.
And finally, if everything is setup properly you should see the container running with the logs in the console of your terminal. This is a running log, and the process is active. You will see something like the screenshot below.
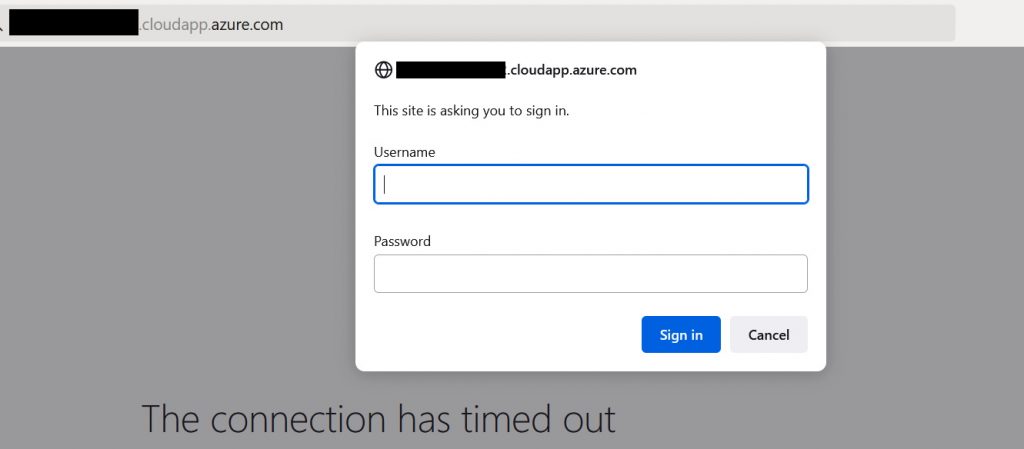
If you didn’t setup a DNS name earlier and thought you can try and use the IP name - that unfortunately will fail with the Traefik proxy server and in the logs, you will see an error to that effect. Let’s Encrypt doesn’t issue certificates for IP addresses as a policy .
Now if we browse the URL (also known as the FQDN) you had setup earlier, you will see an authentication challenge. This is great and shows that the proxy server is setup properly and working as expected.
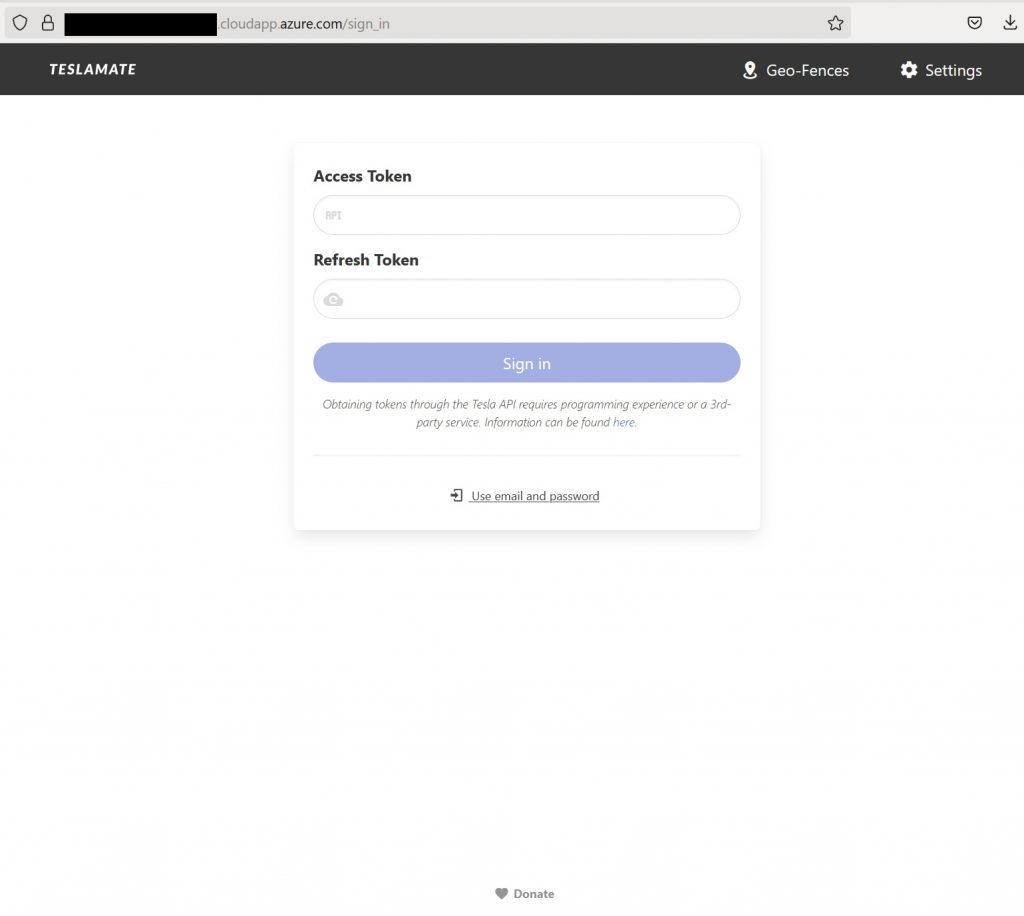
Once you enter the credentials you setup in the .htpasswd file earlier you will be able to login and see the TeslaMate’s Tesla login!
Congratulations! You have TeslaMate running on Azure. ✌️
Step 7 - Finishing up TeslaMate configuration
Now that you have TeslaMate running, you need to login to Tesla. The best way to do this these days is using existing tokens . There are a few ways to do this, and one of the easiest is using this tool - Tesla API Token .
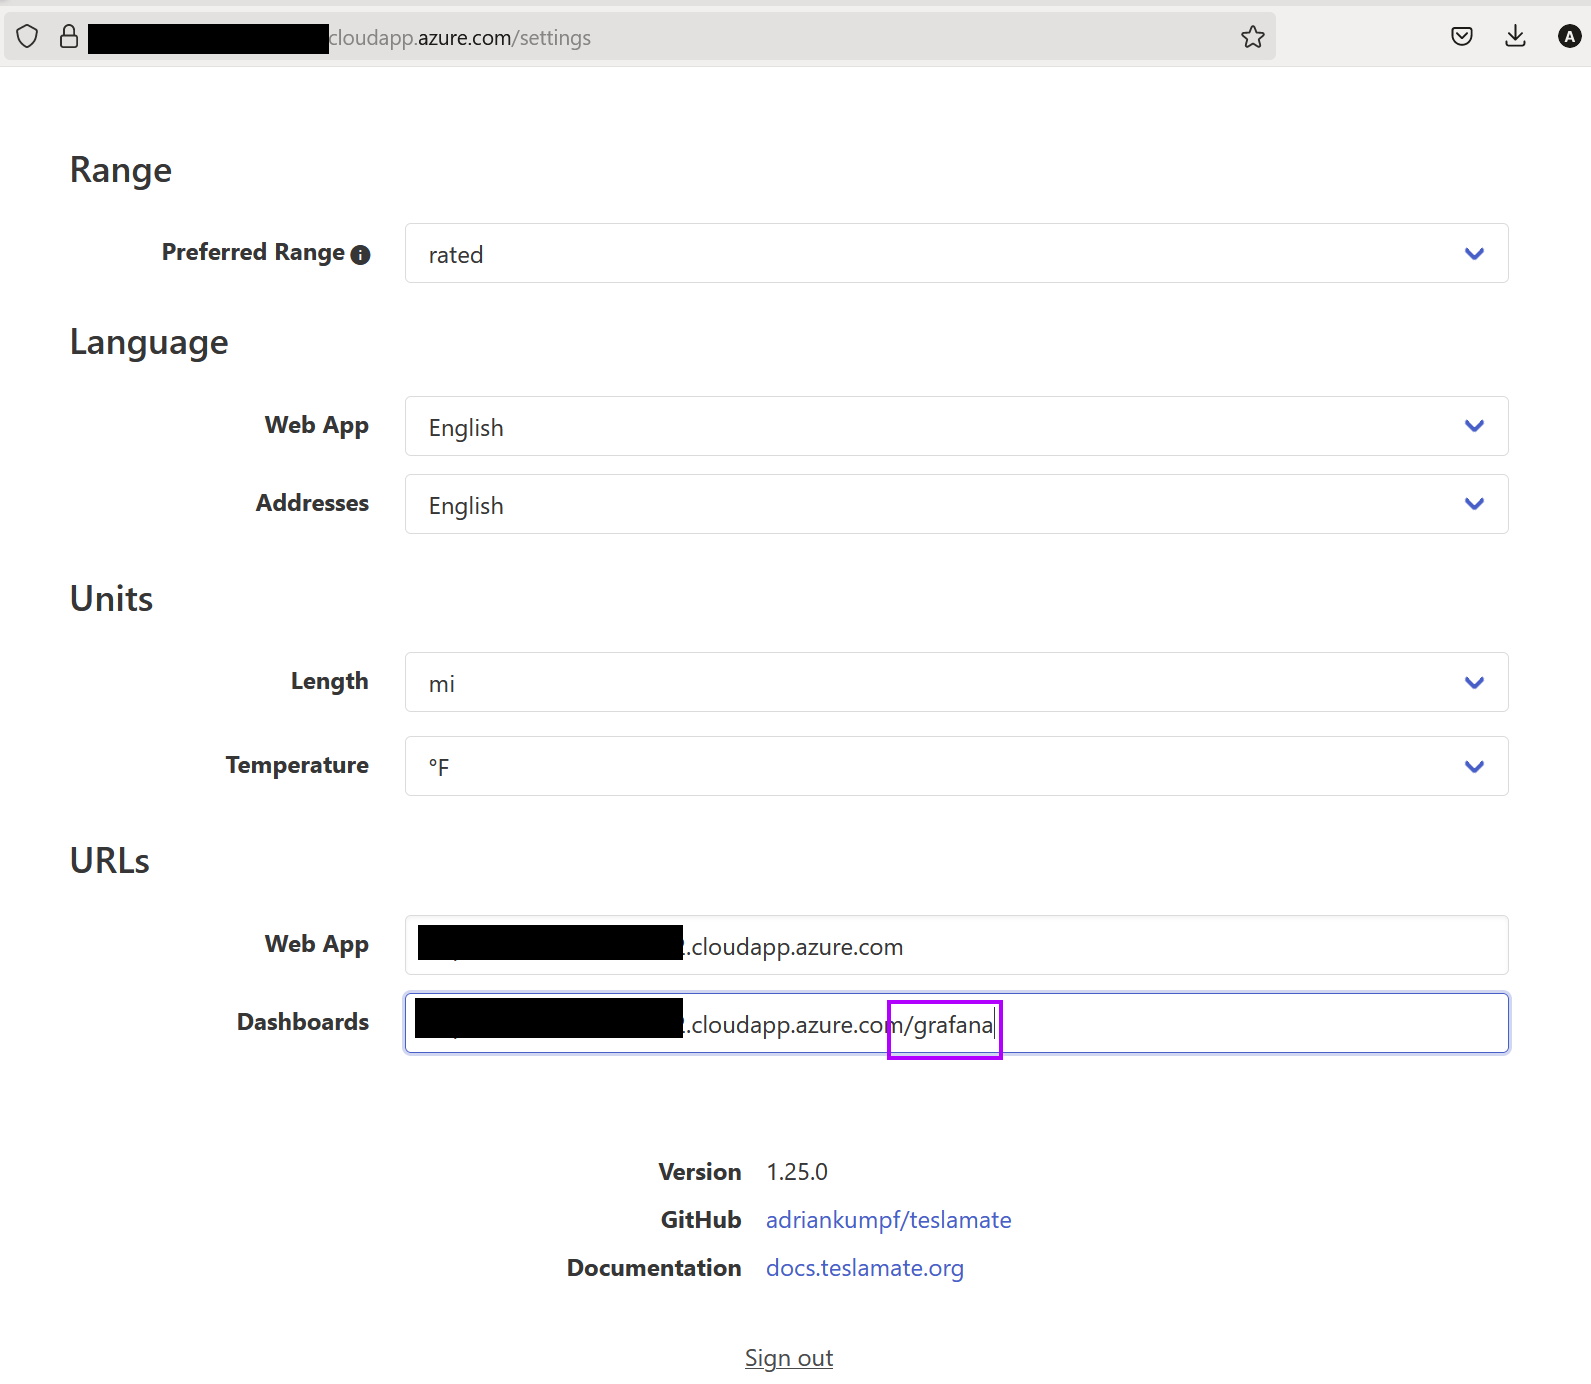
Once you login, go to Settings and change the Dashboards URL - which would be your FQDN with “/grafana” appended. Remember the credentials you use for the dashboards (i.e. Grafana) are the ones you set in the .env file.
Now that everything is up and running, we can kill the docker-compose process, which is attached to the console, and re-run it detached from the console. To do this, go back to the ssh session we have connected to the Ubuntu VM and press CTRL + C. This will stop that container and you will see a similar output as shown below.

And now you can restart the container with the “-d” option, which is for detached.
| |

Congratulations, you have TeslaMate running on an Azure host Ubuntu VM via docker. ✌️
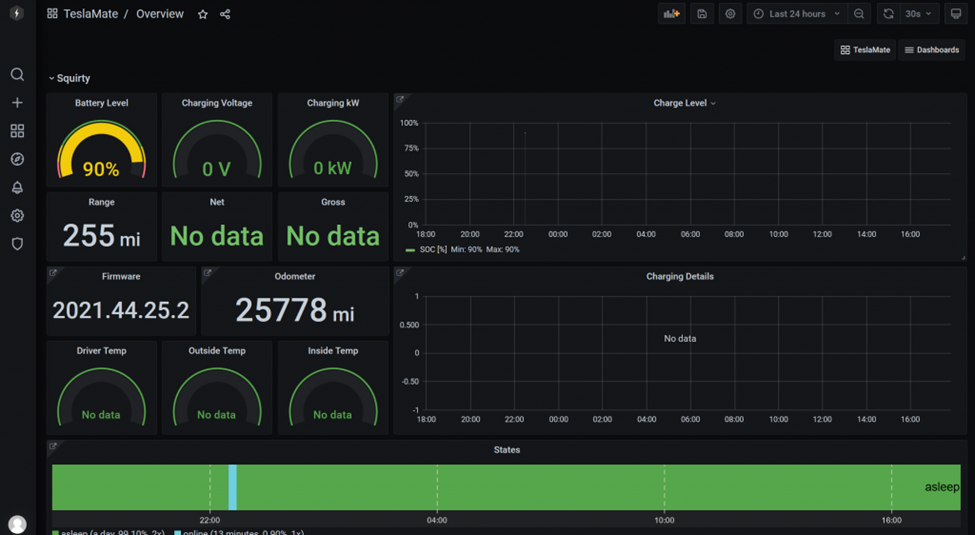
Below is a screenshot of my instance that has been running for some time.