Some time ago, I talked about my Tesla Model 3 “keyfob” which essentially uses a Amazon IoT button to call some of Tesla API’s and “talk” to the car. This for me, is cool as it allows my daughter to unlock, and lock the car at home. And of course it is a bit geeky, and allowing one to play with more things. :)
Since publishing this, I was surprised how many of you ping me asking on details on how they can did this for themselves. Given the level of interest, I thought I will document this and outline the steps here. I do have to warn you, that this would be a little long - it entails getting a IoT Button configured, and then the code deployed. Before you get started, and if you aren’t techy, I would recommend to go through the post completely, so you get a sense of what is needed.
At a high level, below are the steps that you need to go through to get this working. And this might seem cumbersome and a lot but it is not that difficult. Also if you prefer you can follow the official AWS documentation online here .
- Create a AWS Login (if you have a existing Amazon.com login, you can use the same one if you prefer)
- Order a IoT Button
- Register the IoT Button in the AWS Registry (this is done via the AWS console)
- Create (and activate) a device certificate
- Create a IoT security policy
- Attach the IoT security policy (from the previous step) to the device certificate created earlier
- Attach the IoT security policy (now with the associated certificate) to the IoT button
- Configure the IoT button
- Deploy some code - this is done via a server-less function (also called a Lambda function) - this is the code that gets executed
- Test and Deploy
- Enjoy the Fob! :)
Step 1 - Get the IoT Button
Of course you need to get a IoT Button; I got the AWS IoT Button (2nd Generation ) which is what I would recommend.
Step 2 - Login to AWS IoT Console
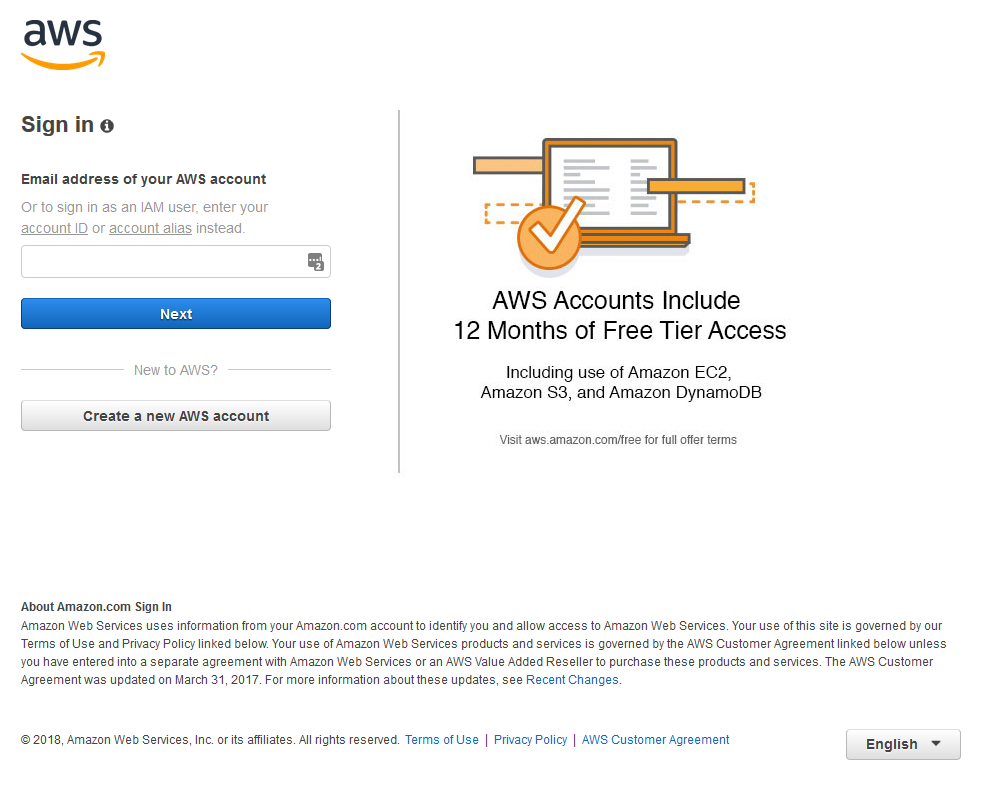
Open AWS home page and login with your amazon.com credentials. Of course if you don’t have a Amazon.com account, then you want to click in sign up on the top right corner, to get this started.
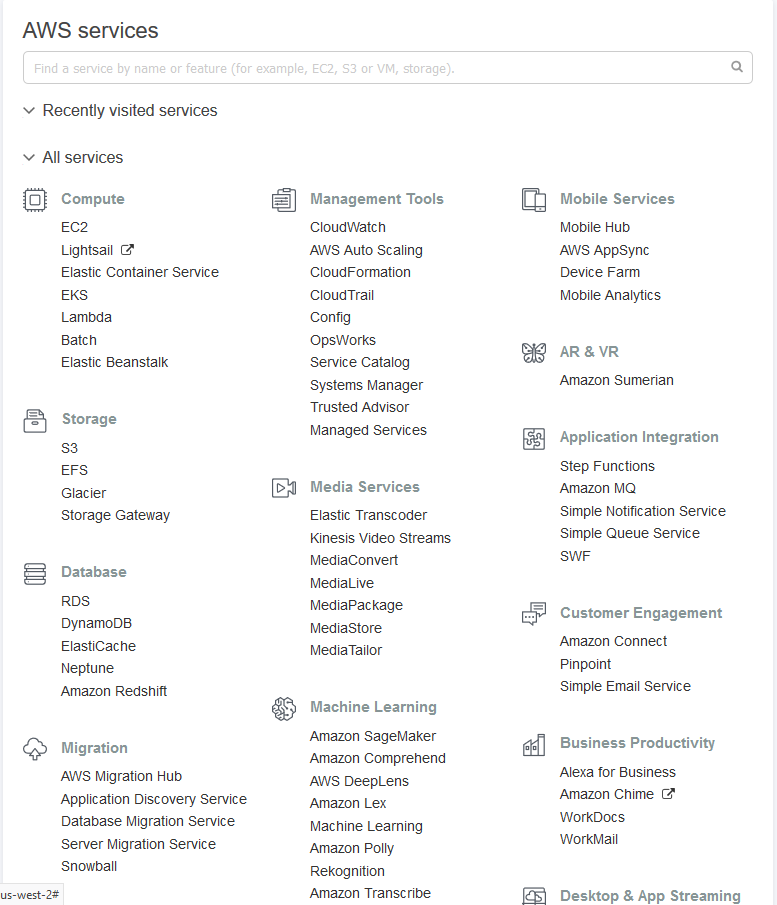
After I login, I see something similar to the screenshot below. Your exact view might differ a little.
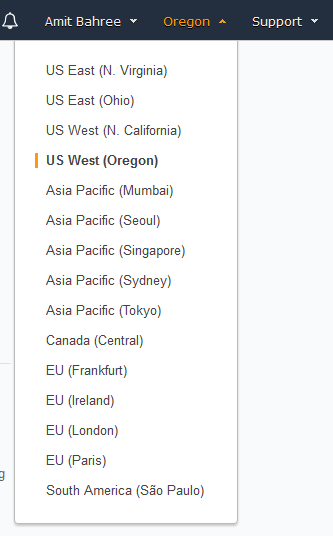
I recommend to change the region to one closer to you. To do this, click on the region on the top right corner and choose a region that is physically closest to you. In the longer run this would help with latency issues between you clicking the button and the car responding. For example in my case, Oregon makes most sense.
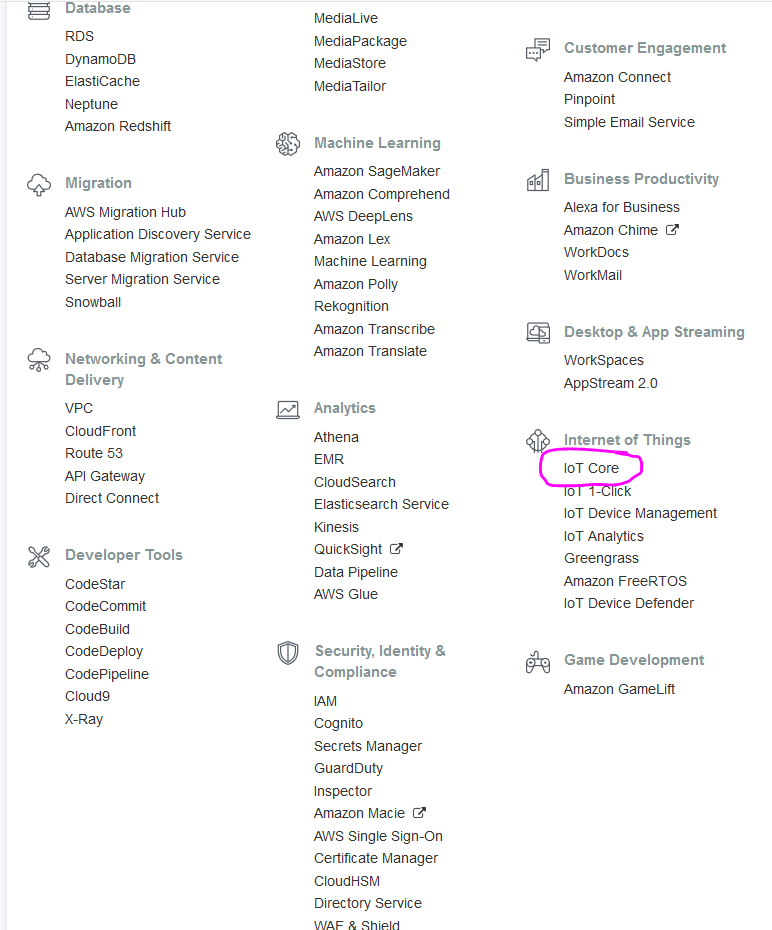
Once you have a AWS account setup, login to the AWS IoT console or on the AWS page in the previous step, scroll down to IoT Core as shown in the screenshot below.
Step 3 - Register IoT Button
Next step would be to register your IoT button - which of course means you physically have the button with you. The best way to register is to follow the instructions here . I don’t see much sense in trying to replicate that here.
Note: If you are not very technical, or comfortable, it might be best to use either the “AWS IoT Button Dev” app which is available both on the Apple Store (for iOS) and Google play (for Android).
Once you have registered a button (it doesn’t matter what you call it) - it will show up similar to the screenshot below. I only have one device listed.

Step 4 - Create a Device Certificate
Next, we need to create and activate a certificate for the device. Without this, the button won’t work. The certificate (which is a X.509 certificate ) protects the communication between the button and AWS.
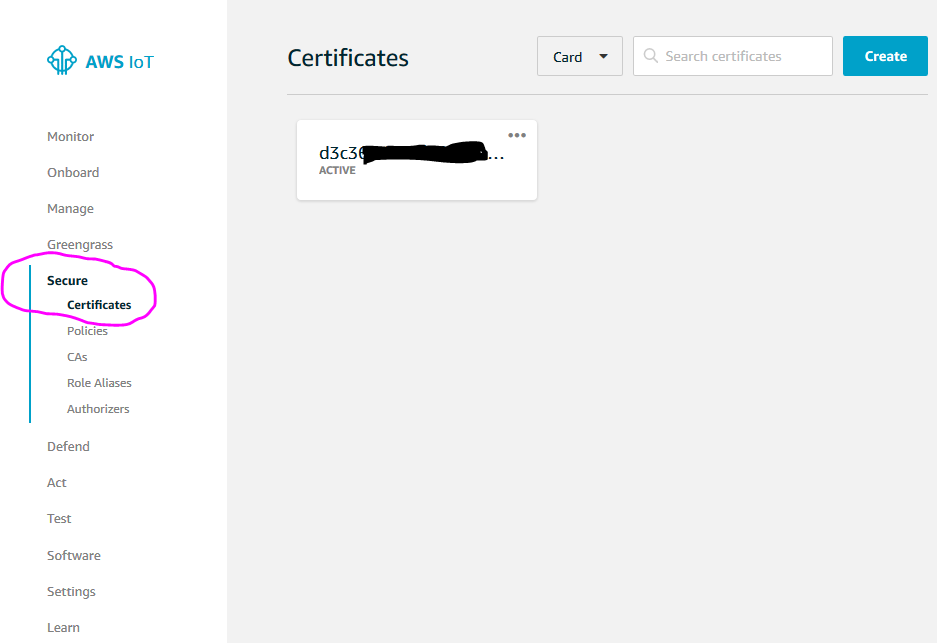
For most people, the one-click certification creation that AWS has, is probably the way to go. To get to this, on the AWS IoT console, click on Secure and then choose Certificates on the left if not already selected as shown below. I already have a certificate that you can see in the screenshot below.
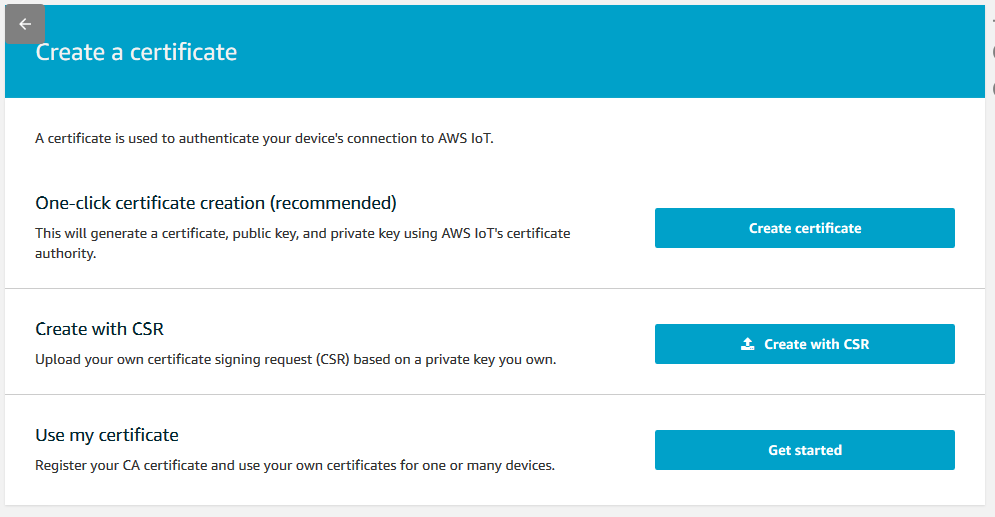
If you need to create a certificate, click on the Create button on the top right corner, and choose one of the options shown in the image below. In most cases you would want to use the One-click certificate option.
NOTE: Once you create a Certificate, you get three files (these are the keys) that you need to download and keep safe. The certificate itself can be downloaded anytime, but the private and the public keys CANNOT be retrieved again after you close this page. It is IMPORTANT that you download these and save them in a safe place.
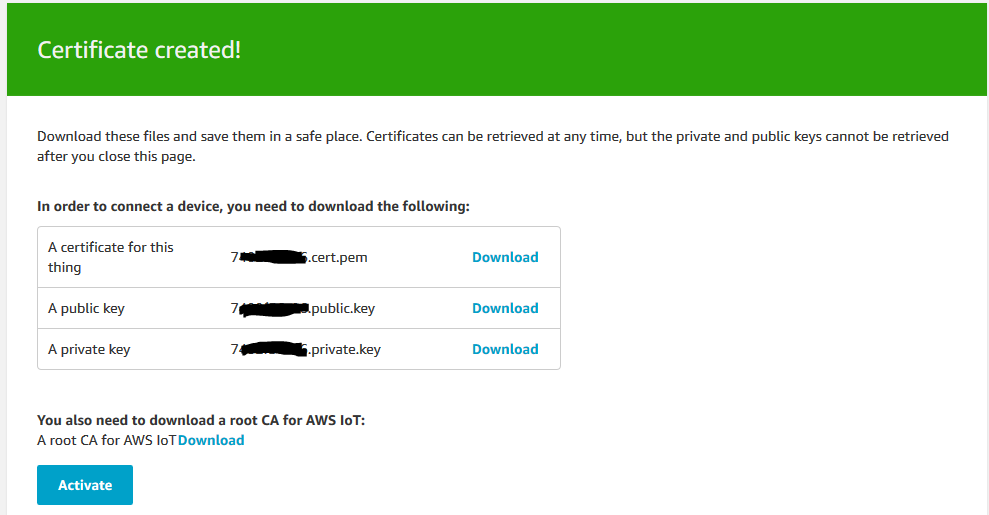
Once you have these downloaded then click on Activate on the bottom. And you should see a different certificate number than what you are seeing here. And don’t worry I have long deleted what you are seeing on this screen. :)
You can also see these in the developer guide on AWS documentation.
Step 5 - Create a IoT Security Policy
Next step is go back to the AWS IoT Console page and click on Policies under Security. This is used to create a IoT policy that you will need to attach to the certificate. Once you have a policy created, then it will look something like the screenshot below.
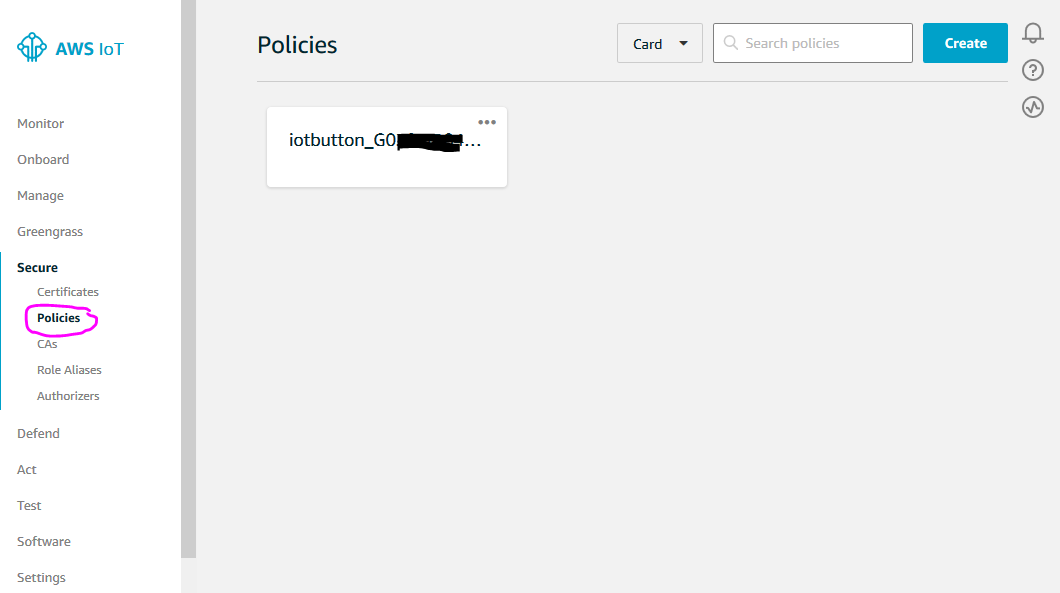
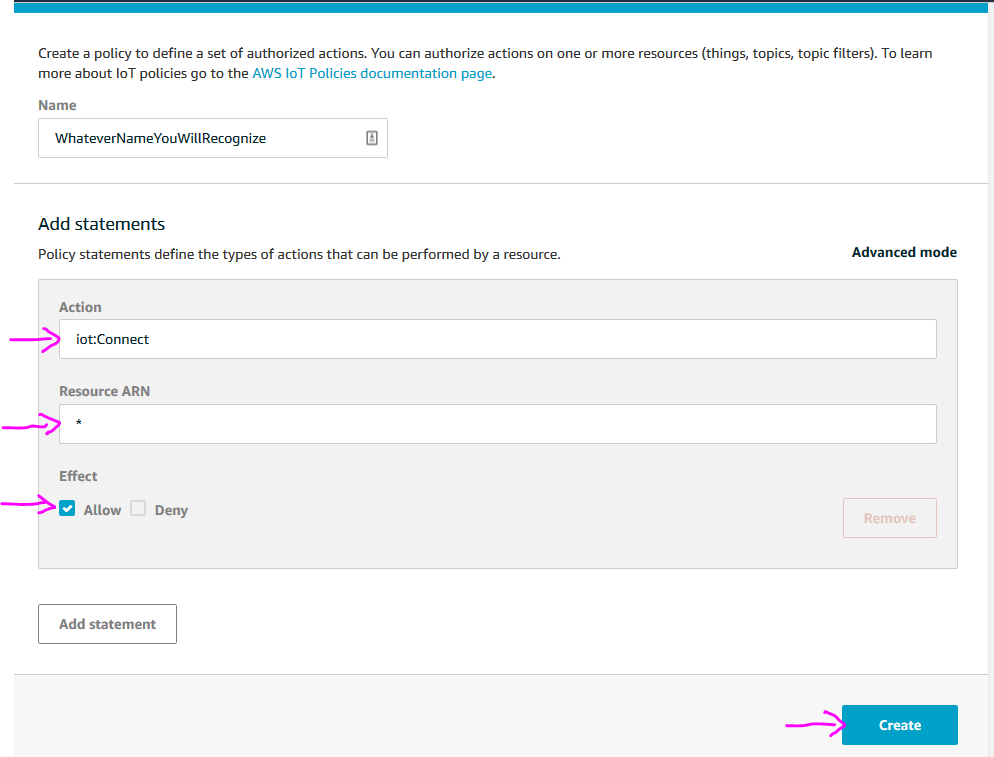
To create a policy, click on Create (or you might be prompted automatically if you don’t have one). On the create screen, in the Name you can enter anything that you prefer. I would suggest naming this something that you can remember and differentiate if you will have more than one button. In my case I named it as the same thing as my device.
- In the policy statements for Action enter “iot:Connect” - without the quotes, but this is case sensitive so make sure you match is exactly.
- For the Resource ARN enter “*” (again without the quotes) as shown below.
- And finally for the effect, make sure “Allow” is checked.
- And click on Create at the bottom.
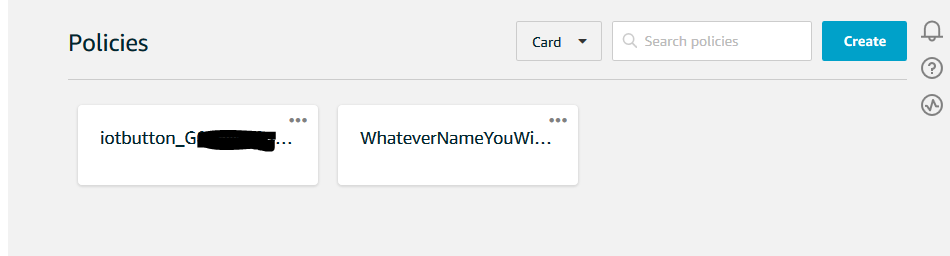
After this is created this you will see the policies listed as shown below. You can see the new one we just created with “WhateverNameYouWillRecognize”. You can also see these and more details on the developer documentation - Create a AWS IoT Policy .
Step 6 - Attach a IoT Policy
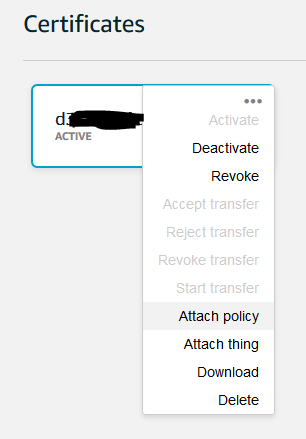
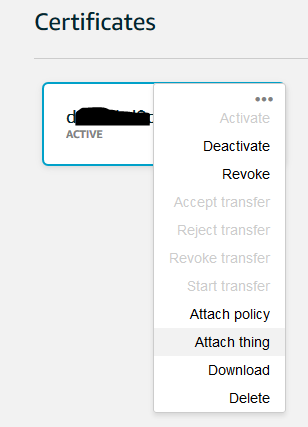
Next step is to attach the policy that is just created to the certificate created earlier. To do that, click on Secure and Certificates on the left, and then click on the three dots (called ellipses) on the top right of the Certificate you created earlier. From the new menu that you get, choose “Attach Policy” as shown below.
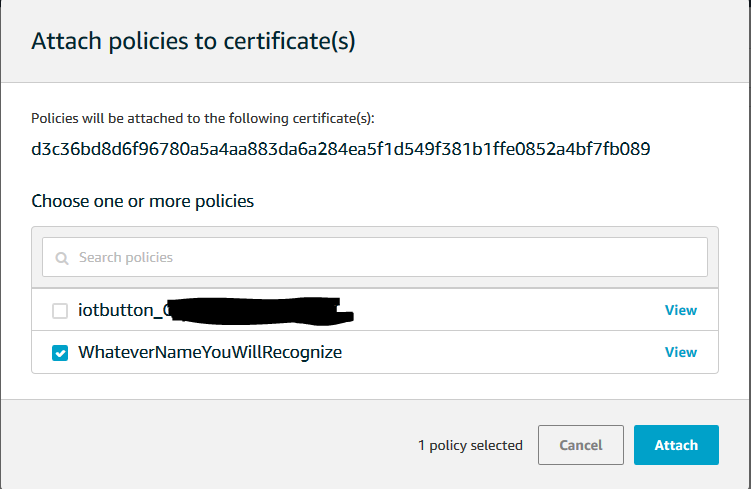
From the resulting menu, select the policy that you had created earlier and select Attach. Using a sensible name that you would recognize would be helpful. You can also see these details on the developer documentation .
Step 7 - Attach Certificate to IoT Device
Next step is to attach the certificate to the IoT device (or thing). A device must have a certificate, a private key and a root CA certificate to authenticate with AWS. Amazon also recommends to attach a device certificate to the device - this probably isn’t helpful right now, but might be in the future if you start playing with this more.
To do this, select the certificate under Security on the left, and same as the previous step, by click on the three dots on the top right corner, select “Attach thing”.
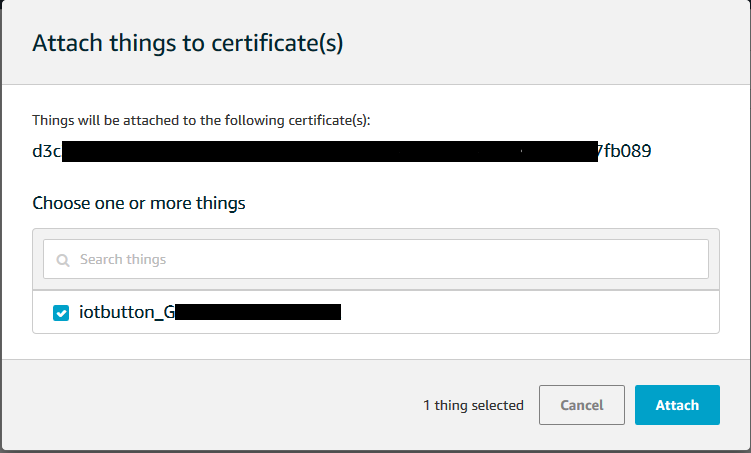
And from the next screen select the IoT button that you registered earlier, and select “Attach”.
Step 8 - Configure IoT Button
To validate that everything is setup correctly - the certificate needs to be associated with a policy, and a thing (the IoT button in our case). So on the Certificates menu on the left, select your certificate by clicking on it (not the three dots this time - but rather the name). You will see a new screen that shows the details of the certificate as shown below.
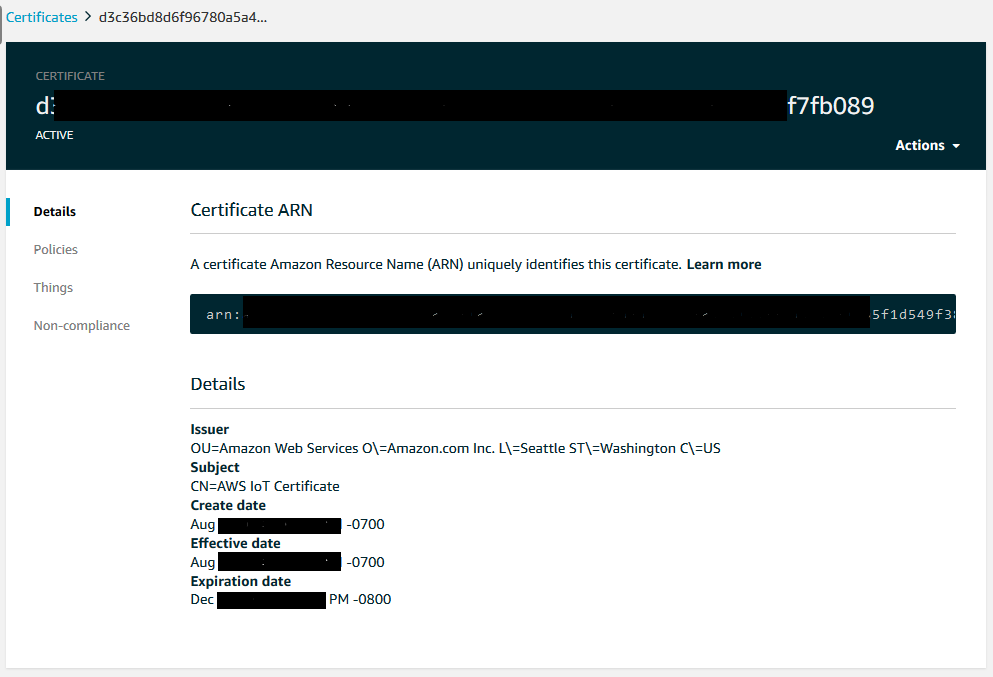
And on the new menu on the left, if you click on Policies you should see the policy you created, and the Things should have the IoT button you created earlier.
Once all of this is done the next step is to configure the device. You can see more detailed steps on this on the developer guide here .
- KEY TIP: The documentation doesn’t make it too obvious, but as part of configuring - the device (IoT Button) will become an access point that you will need to connect to and upload the certificates and key you created earlier. You cannot do this from a phone and it is best done from a desktop/laptop that has wifi network. Whilst these days all laptops will have a wifi network card, that isn’t necessarily true for desktops. So use a machine which has a wifi that you can temporarily connect to the access point that the IoT device creates.
- Note this is only needed for getting the device configured to authenticate for AWS, and get on your Wifi network; once that is done you don’t need to do this.
- Once you have configured the device as outlined ( https://docs.aws.amazon.com/iot/latest/developerguide/configure-iot.html ) then continue to the next step.
Step 9 - Deploy some code
At last we are starting to get the interesting part - a lot of what we were doing until now, was getting the button configured and ready.
Now that you have a IoT button configured and registered, the next step is to deploy some code. For this you need to setup a Lambda function using the AWS Lambda Console .
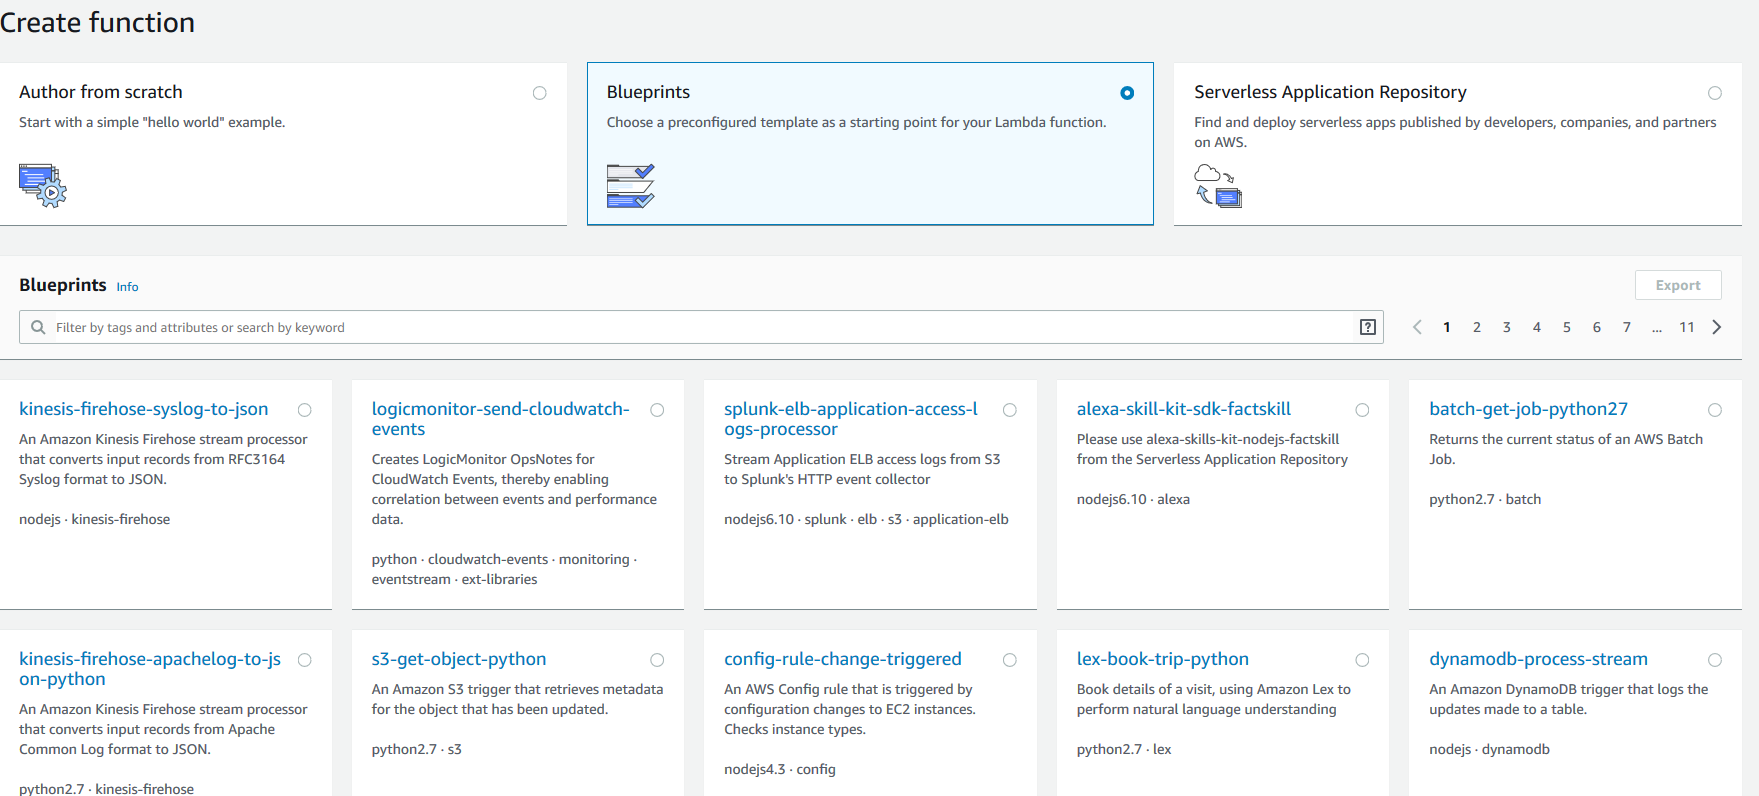
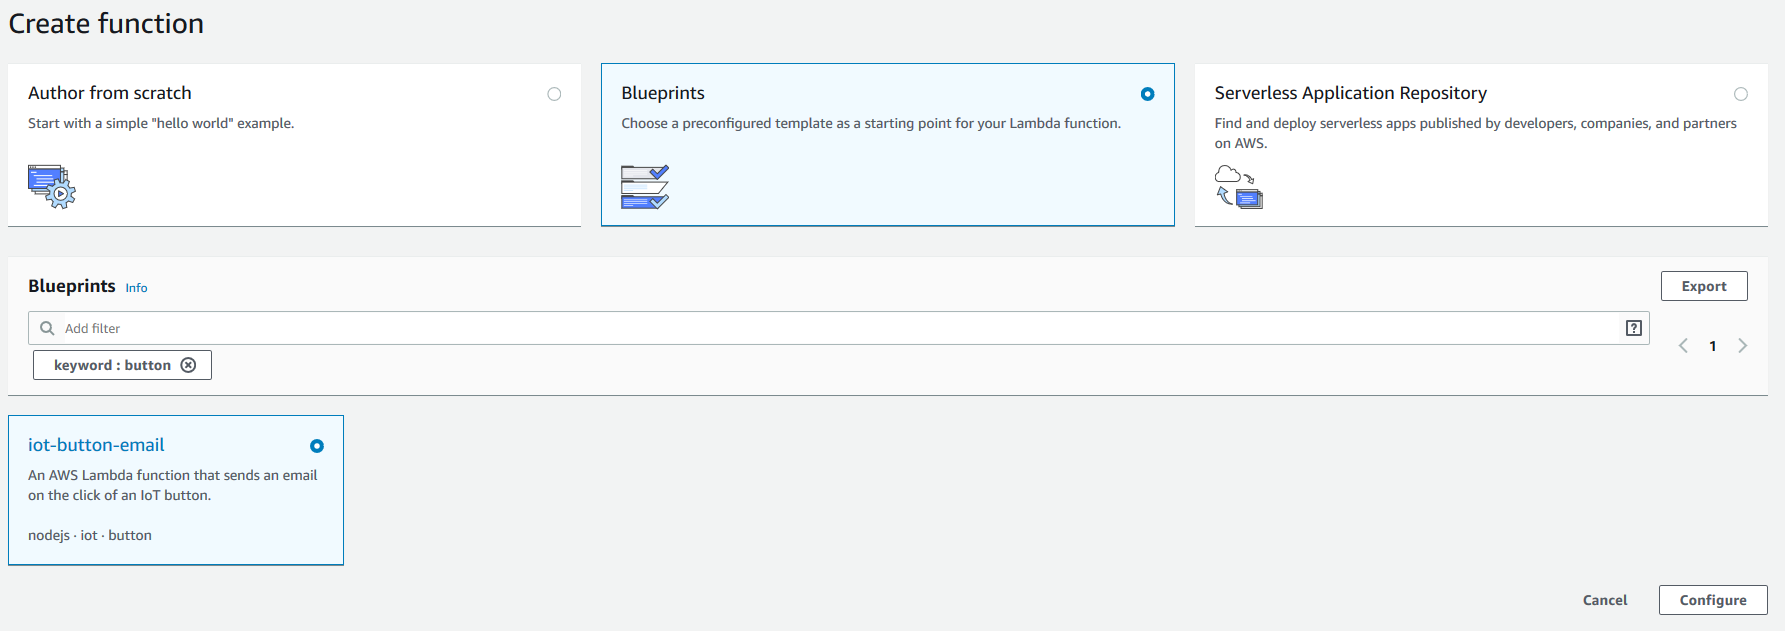
When you login, click on Create Function. On the Create function screen, choose the Blueprints option as shown below. You can see some of these in the developer documentation here .
Step 10 - Blueprint Search
On the Blueprints search box (which says Filters by tags), type in “button” (without quotes) and press enter. You should see an option called “iot-button-email” as shown below, select that and click configure on the bottom right corner.
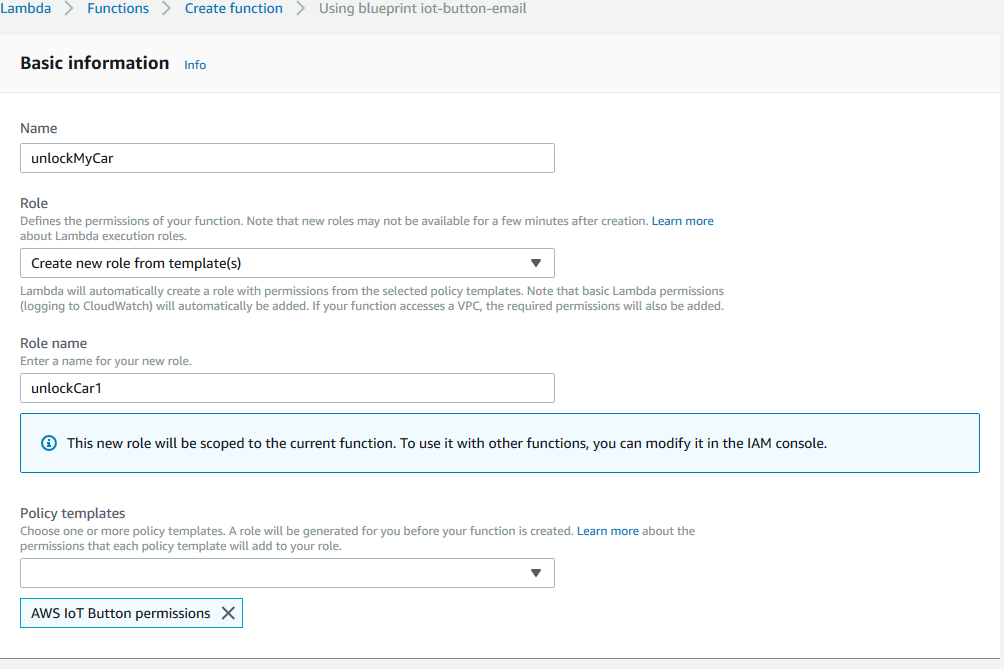
Step 11 - Basic Information
On the next screen that says “Basic information”, enter the details as shown below. The names should be meaningful for you to remember. Roles can be reused across other areas, for now you can use a simple name something like “unlockCar” or “unlockCarSomeName” if you have more than one vehicle. The policy template should already be populated and you shouldn’t need to do anything else.
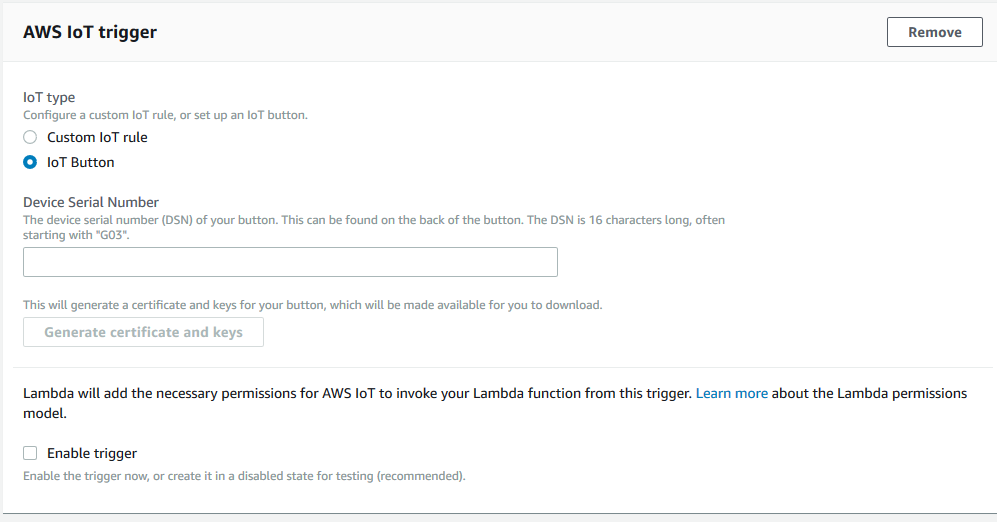
For the 2nd half - AWS IoT Trigger, select the IoT type as “IoT Button” and enter your device serial number as outlined in the screenshot below.
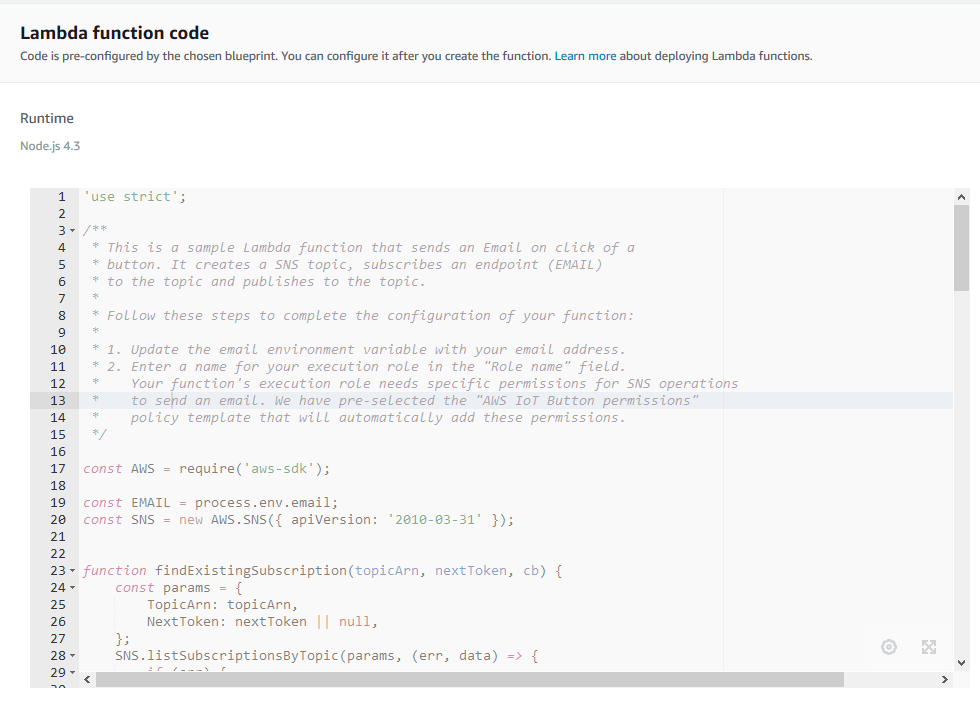
It won’t hurt to download these certificate and keys in addition to the ones created separately and save them in different folders. And for the Lambda function code, it doesn’t matter on the template code as we will be deleting it all. At this point that will be read-only and you won’t be able to modify anything - as shown in the screen shot below.
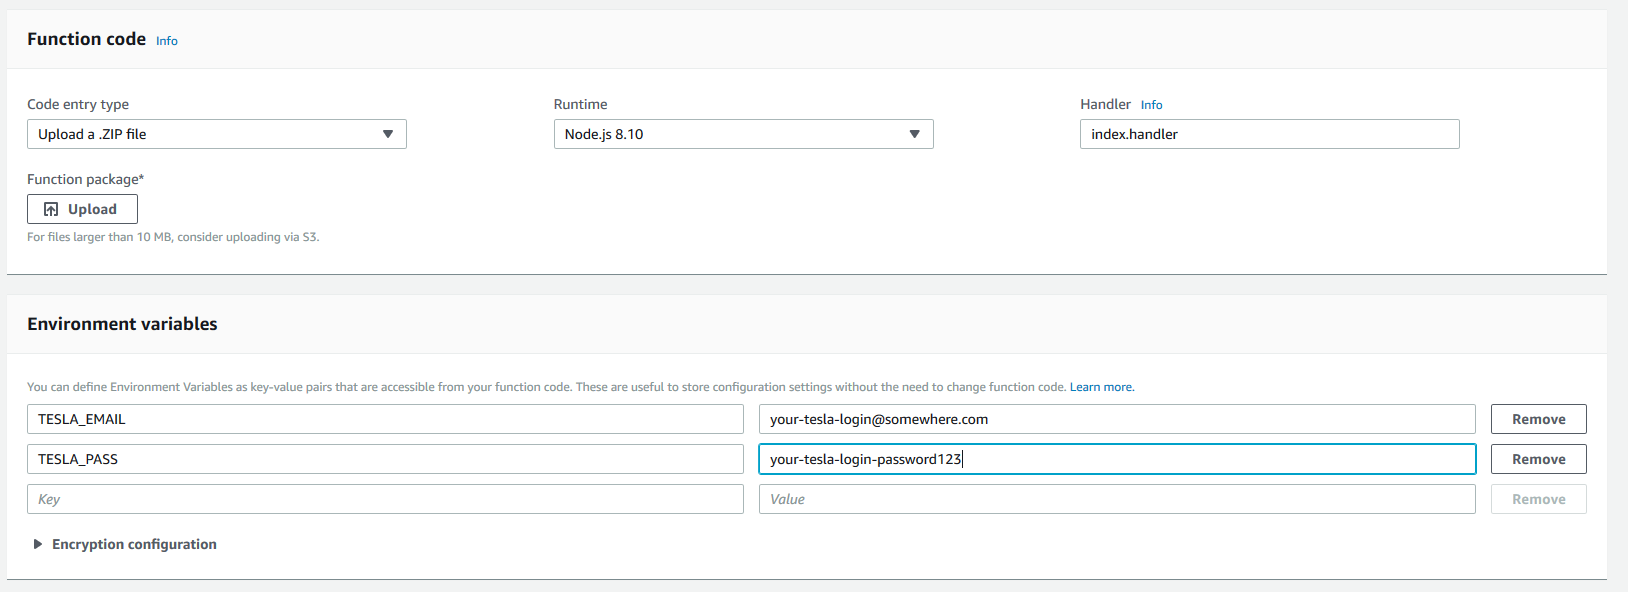
And finally scrolling down more, you will see the environment variables. Here is where you need to specify your Tesla credentials to it to be able to use create the token and call the Tesla API. For that you need the following two variables: TESLA_EMAIL and TESLA_PASS. These case sensitive so you need to enter them as is. And then finally click on Create function.

Step 12 - Code upload
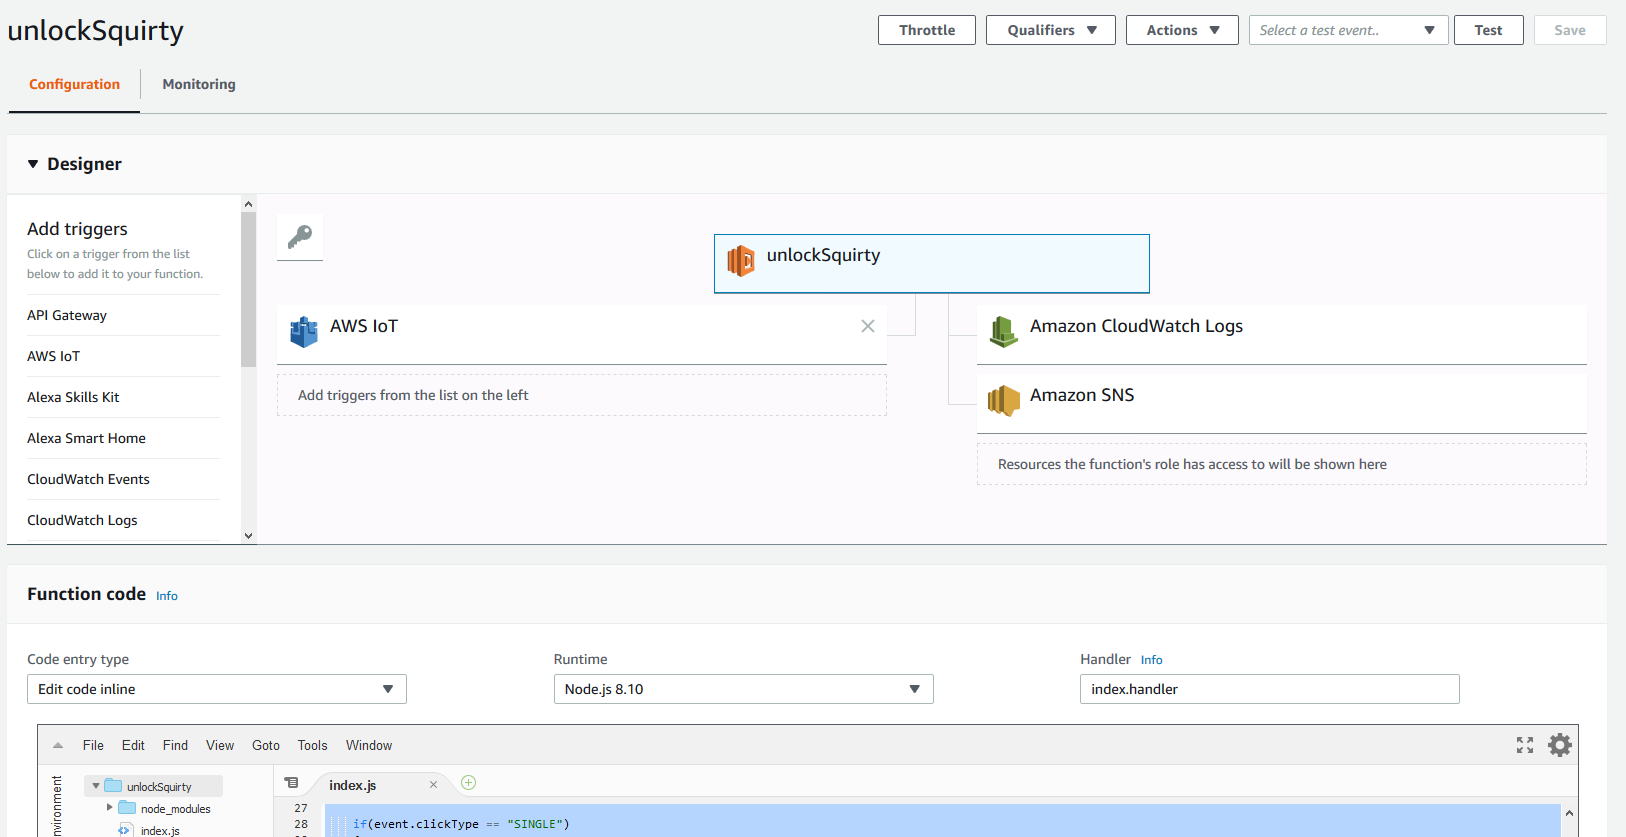
Once you create a function, you will see something like the screen below. In my case the function is called “unlockSquirty” which is what you are seeing. This is divided in to two parts - when on the Configuration page. The top part is the designer that visually shows you what inputs are the triggers that execute the function, and then what it outputs to on the right hand side. And below the designer is the editor where one can edit the code inline or upload a zip file with the code.
In the function code section, on the first drop down in the left (Code entry type) select upload a .zip file.

And on the next screen upload the function package that you can download from here.
- Make sure the Runtime is Node.js 8.10
- Keep the Handler as the default.
- Double check your Environment variable contain TESLA_EMAIL, and TESLA_PASS.
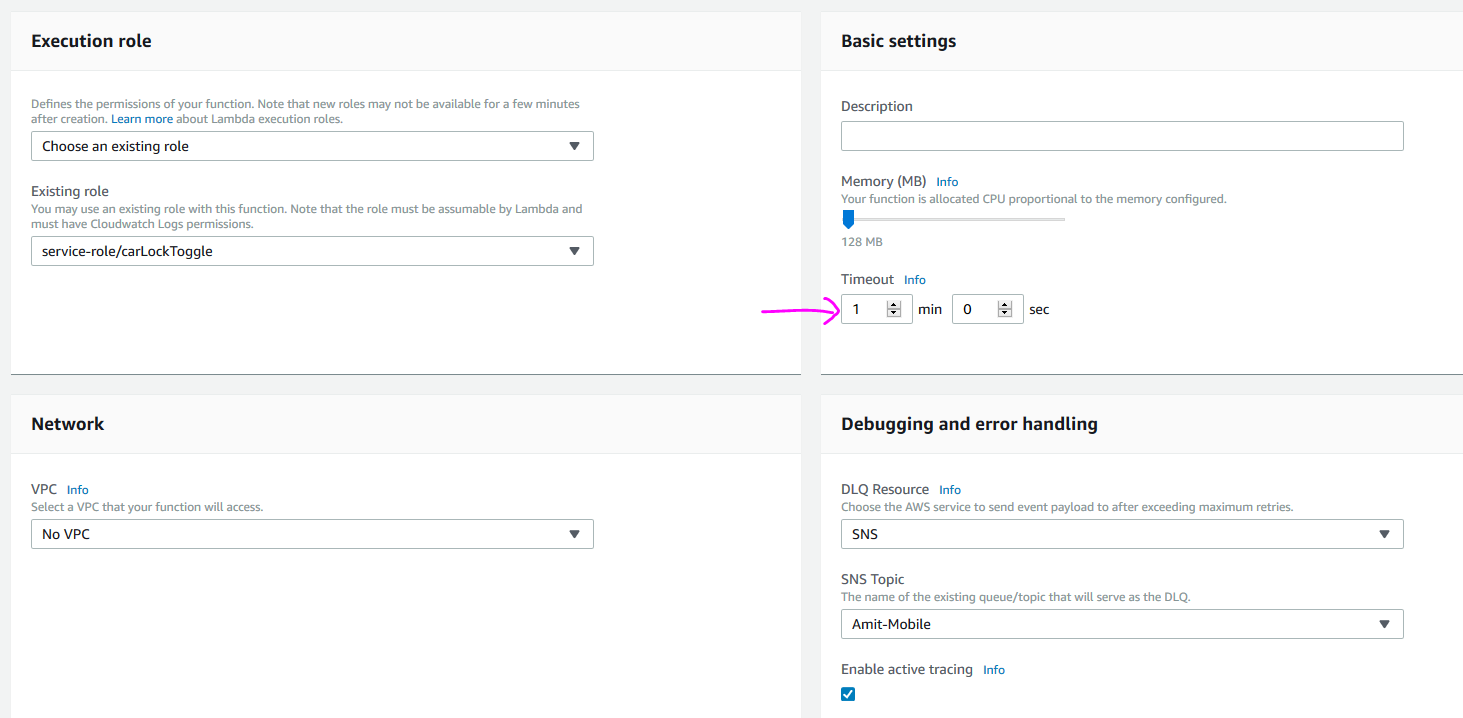
And scroll down and in the Basic settings, change the timeout to 1 minute. We run thus asynchronously and adding a little buffer would be better. You can leave all the other settings at their default. If your network might be iffy you can make this 2 mins.
Step 13 - Code Publish
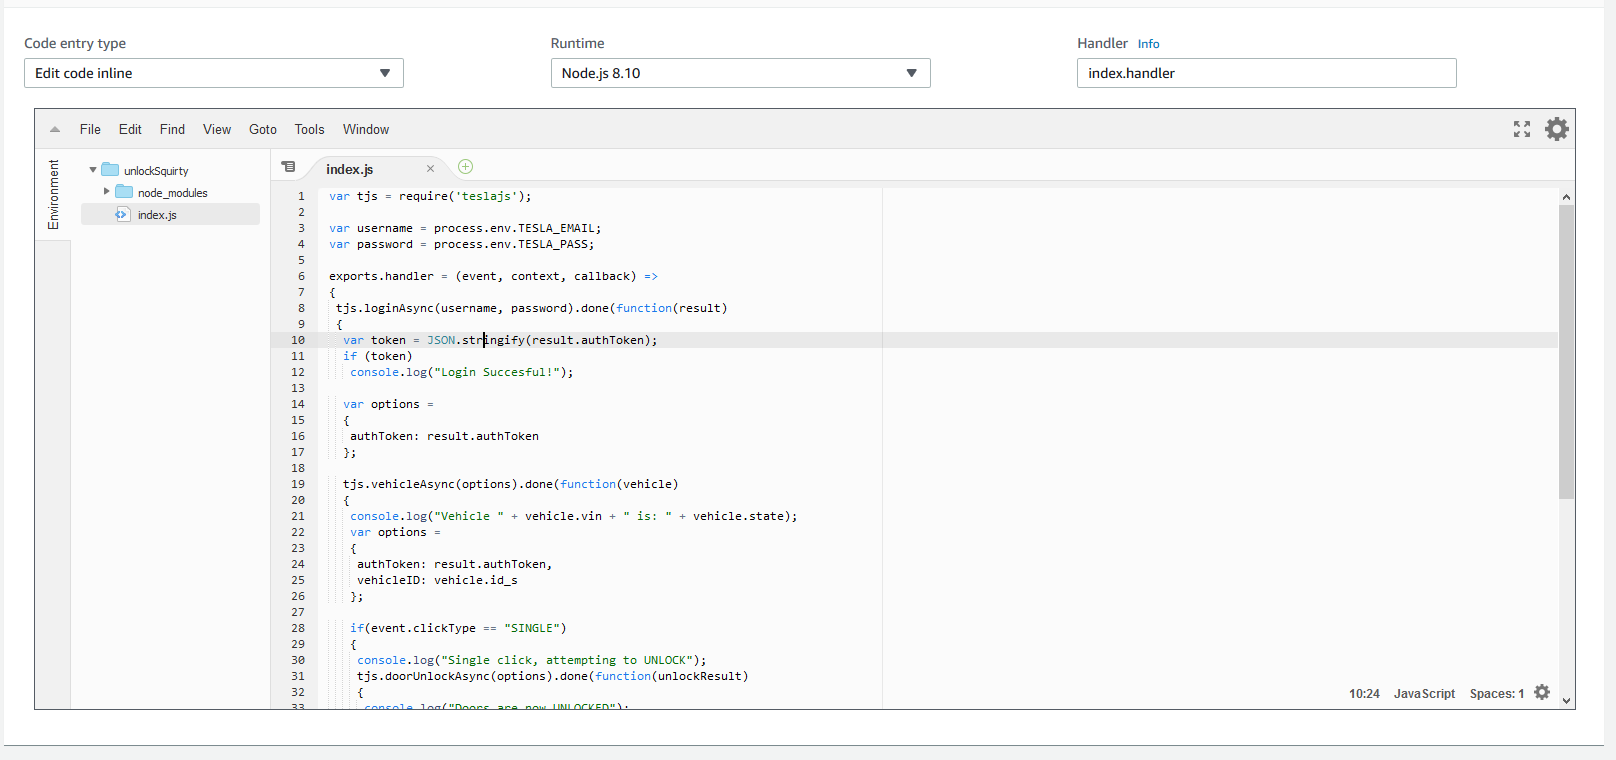
Once you have entered all of this, click on Save on the top right corner and then publish new version. Finally once it is published you will be able to see the code show up as shown in the screenshot below.
Again, a single click will unlock the car, a double-click would lock it, and a long press (holding it for 2-3 seconds) would open the charge port door.
And here is the code:
| |