If you are having constant issues with a specific hardware, then one of the culprits could be a corrupt device driver for that hardware. In simple terms, a device driver is nothing but another computer program which allows Windows and other applications to interact with the specific hardware. Since this is very hardware specific, generally one need to install the specific drivers for that device.
Windows has something called “Device Manager” which as the name might suggest is used to manage devices. Devices are nothing but the various hardware elements that make up your computer. Some of these are internal (such as CPU, RAM, Hard disk, etc.) and other external such as the monitor, printer, mouse, etc.
At a high level, the process is as follows:
- Open Computer Management
- Find the corrupt/offending device in Device Manager
- Remove the device (and possibly remove the drivers as well)
- Re-install the device (including the drivers if required).
I have a few screenshots showing the step-by-step process. Whilst these screenshots were taken on a Windows 7 machine, if you are running Vista, the process is the same.
Step 1 – Opening Computer Management
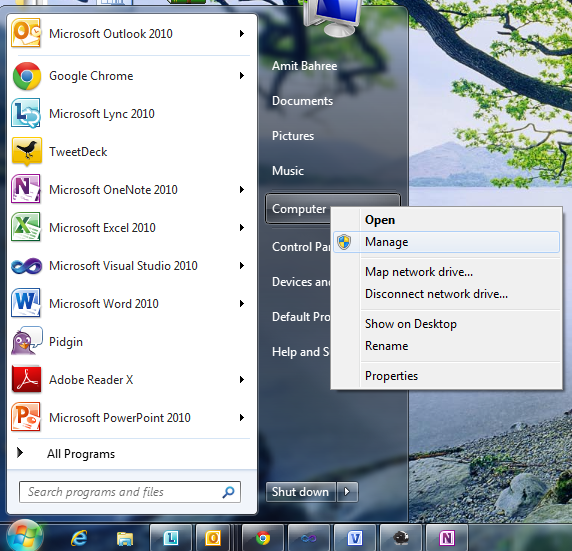
- Click on Start
- Right-click on the Computer (on the right side of the Menu)
- From the new menu select “Manage” as shown below.
- You need Administrator rights for this, so depending on your Security Setting, Windows might ask you to Confirm or ask for different credentials.
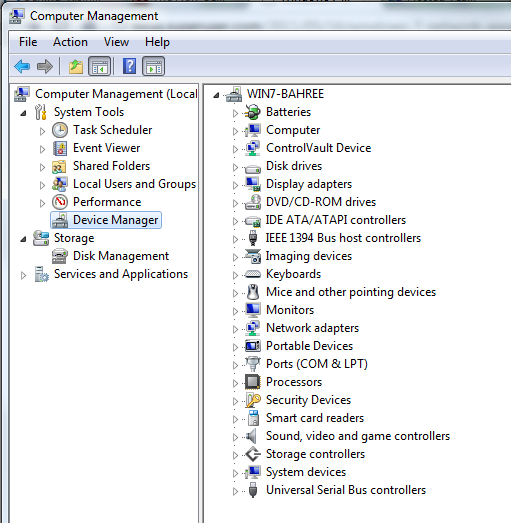
Step 2: Opening Device Manager
A new window called Computer Management will open. On the left, under System tools you will find an option called “Device Manager”. Click on that and on the right hand side you will see all the devices of your computer; the devices are grouped by different categories as shown below.
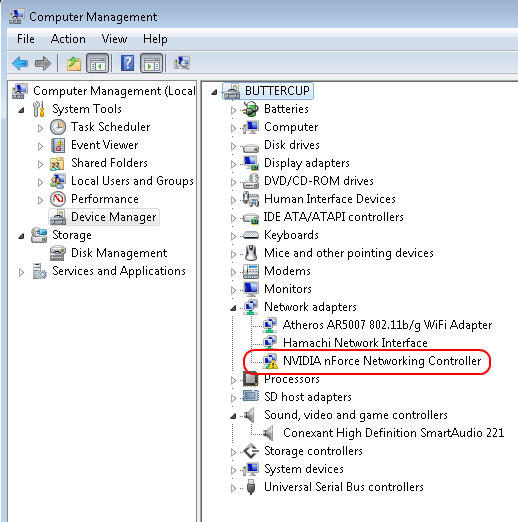
If there is a problem being reported with some device (for whatever reason) then you will see a Yellow warning triangle next to it. For example in the screenshot below you can see the NVIDIA nForce Networking Controller has some issue. On the other hand, if all the devices are operating correctly (or at least that is what Windows thinks) then you won’t see this and would see something similar to the screenshot above.
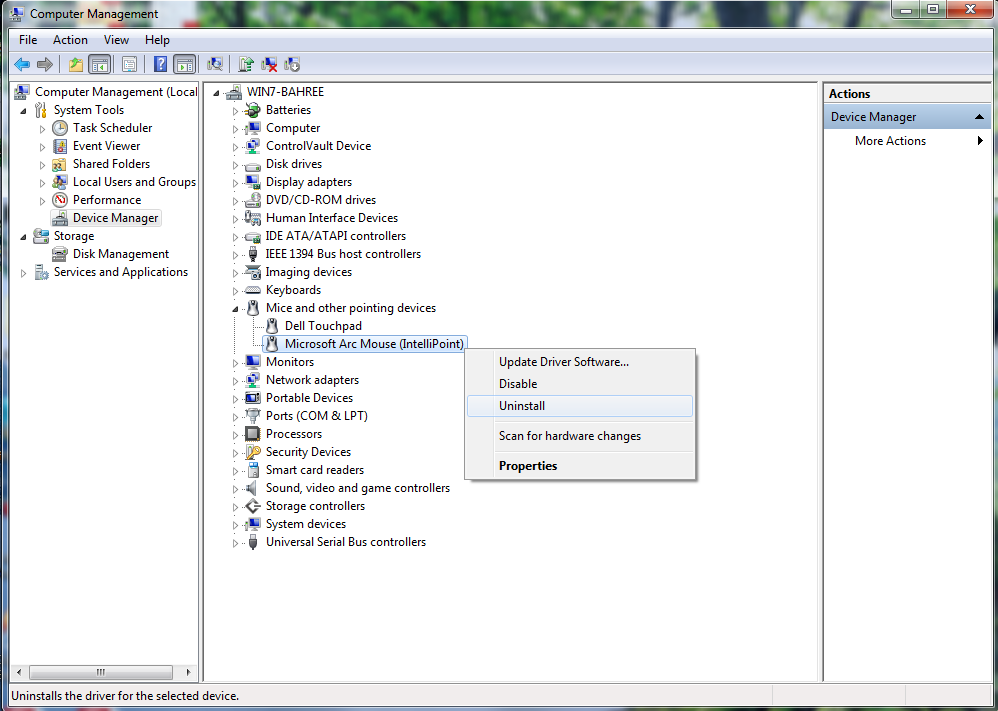
Step 3: Uninstalling the Device
Select the device you want to uninstall and right click on it. From the new menu, select the Uninstall option as shown below.
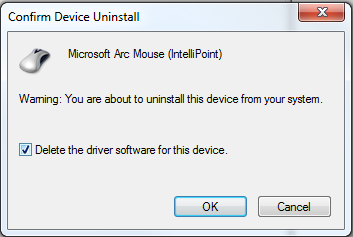
Step 4: Removing the Driver
When you choose the Uninstall option (from Step 3), you will get a confirmation screen as shown below. If the driver is corrupt or causing issues, then you check the option which says “Delete the driver software for this device”.
WARNING: If Windows cannot automatically install your device because you need to either download the drivers from the manufacture’s website or use a CD/etc. then make sure you have this before you choose to Delete the driver software.
Step 5: Reboot (Optional)
Windows might not ask you to reboot. But depending on the device it might be a good idea to reboot just to make sure everything is cleaned out.
Step 6: Add back the Device
If you did reboot, next when you start and login, in most cases Windows will automatically find the new device and either install the drivers or ask you for the CD or path where the driver software can be found.
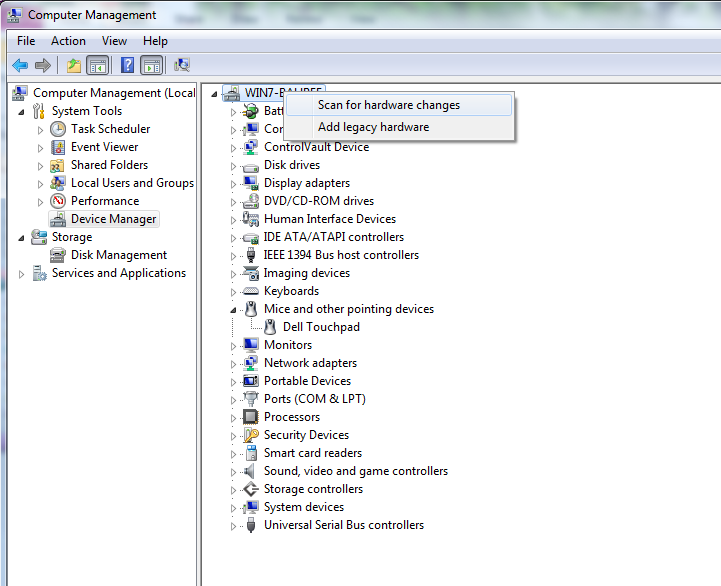
On the other hand, if you did not reboot or Windows did not detect your device automatically, then you go back to Device Manager (as shown in Steps 1 and 2), right click on the Computer name (this will be the first item in the Device Manager). From the menu choose the “Scan for hardware changes” option – Windows should now find out device.